Admin and Apps - Django Tutorial
Welcome to part 3 of the web development with Django and Python tutorial series. In this tutorial, we're goign to be checking out the admin functionality that comes with Django.
In order to do this, we need to first create an administrator user. To do this:
python3 manage.py createsuperuser
Username (leave blank to use 'harrisonkinsley'): sentdex
Email address: harrison@pythonprogramming.net
Password:
Password (again):
Superuser created successfully.
The email can just be left blank. The superuser is like other users, and Django user objects just happen to come with email fields. That said, django has built-in some reporting features that will email your superusers when exceptions are hit, which can be useful. More information on that: Django email reports
Now that we've done that, let's log in to the admin page:
http://127.0.0.1:8000/admin
Log in with the user we just created, and you should see a page like:
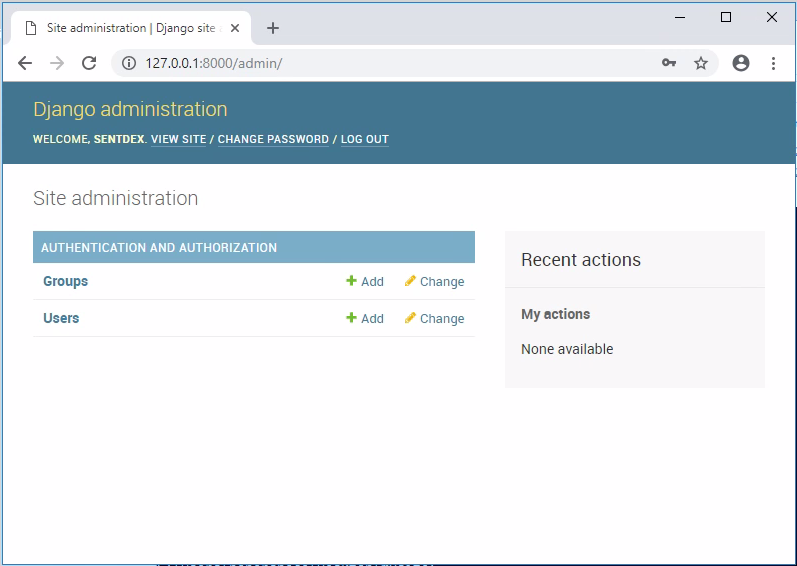
Here is where you can interact with your models via an actual user interface. In here, you can see, modify, add, or remove entries for your models that are registered here. As you can see, it looks like the only models available to us are Groups and Users, however. That said, go ahead and click on users, then on the username you just created. As you can see, there are actually quite a few fields here. That's because this is Django's User model. Still, all these fields here, available to us to edit things, is pretty darn cool. We could even add new users right here in the admin. We're probably not going to be adding users ourselves, however. We will be adding tutorials, however, so how might we get our Tutorials model in this neat place? All we need to do for this is register them.
To do this, head to mysite/main/admin.py and add the following import:
from .models import Tutorial
Then do:
admin.site.register(Tutorial)
...and that's it for now. The full mysite/main/admin.py file is:
from django.contrib import admin
from .models import Tutorial


admin.site.register(Tutorial)
Now, refresh your website/admin page http://127.0.0.1:8000/admin/, and you should see:
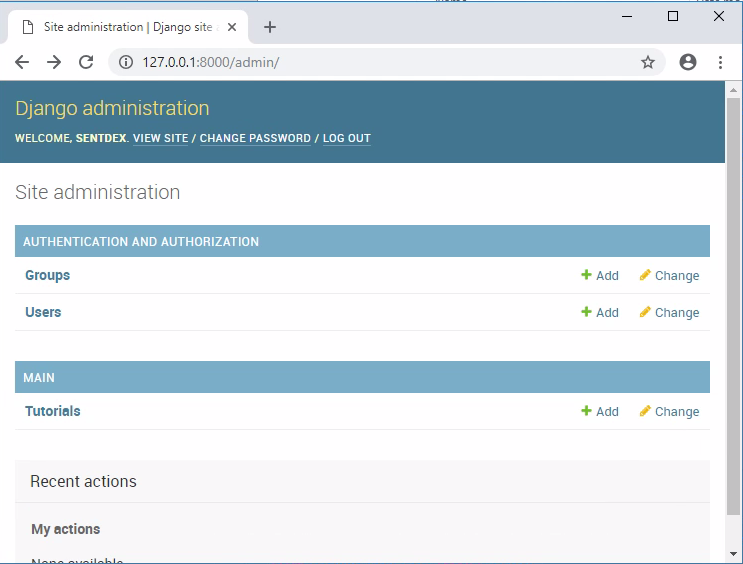
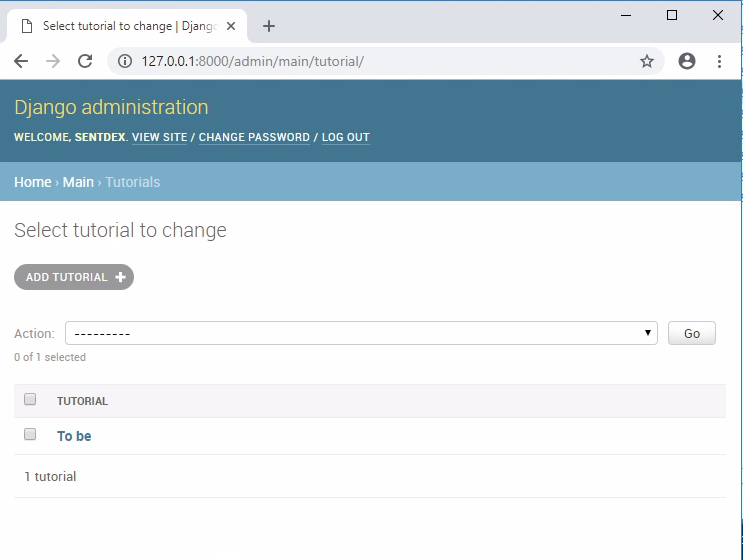
Now, click on Tutorials, and you should see the tutorial we created from the shell:
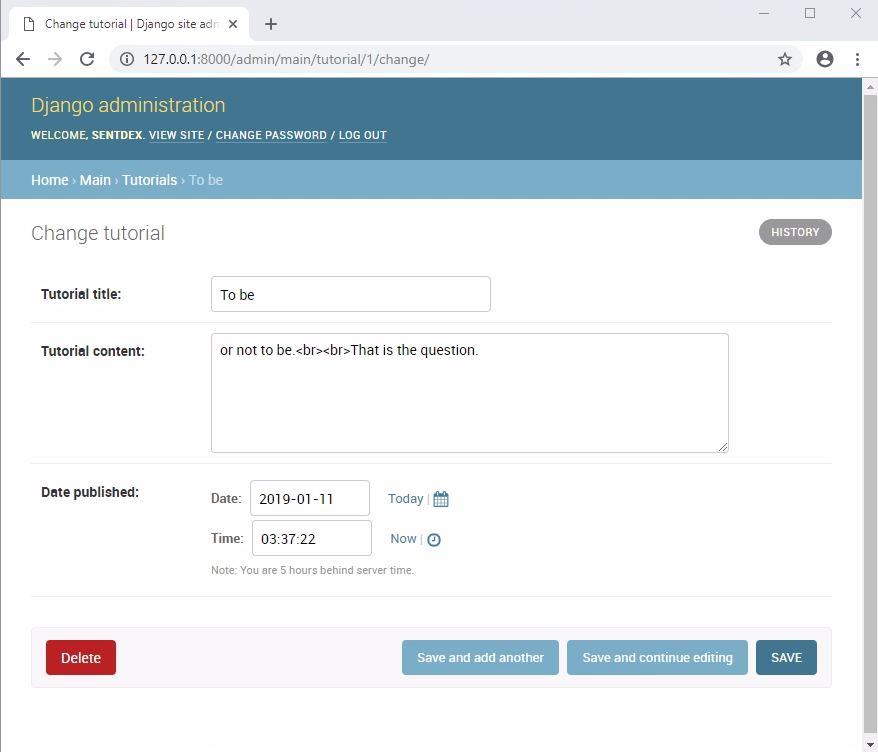
We can then click on that entry to edit it:
From that previous page, we can also choose to add a new tutorial, for example:
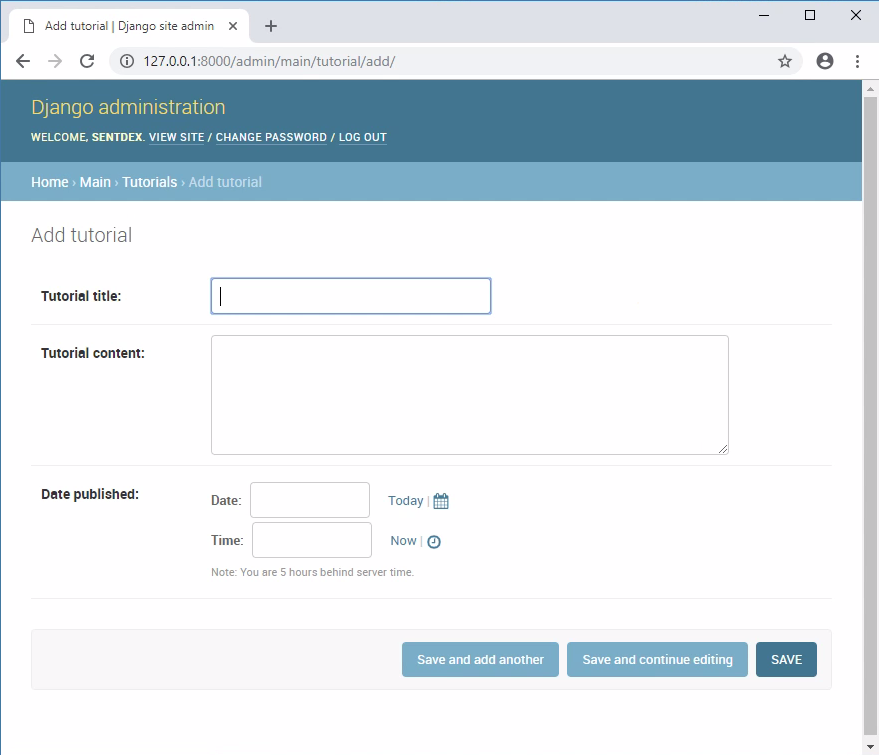
Notice how the fields are all kind of different. The title is a small, one "row" entry. Then the content is a larger box. The date entry boxes are the shortest, one row, and they even have calendar and clock options. To make things even cooler, the dates allow for us to just quickly click "today" and "now." This...is...AWESOME!
Django does all this through the field types we chose in our model, from there, this admin page can list out all of your models, allow you to edit them, add them, and delete them.
If you've ever needed to write an admin control panel like this, you're likely very giddy right now. This is a pretty awesome thing that you get from Django right out of the gate.
But wait, there's more! We can organize how this model is presented to us. It's not always the case that the order of the columns in the table is what we prefer. We also might not care about all of the columns. To modify how this is presented to us, let's go back to edit the admin.py file
mysite/main/admin.py
from django.contrib import admin
from .models import Tutorial


class TutorialAdmin(admin.ModelAdmin):
    fields = ["tutorial_title",
              "tutorial_published",
              "tutorial_content"]

admin.site.register(Tutorial,TutorialAdmin)
Now, we have the same information here, but the order it is presented to us has changed. We could also comment out the tutorial_published part, like:
from django.contrib import admin
from .models import Tutorial


class TutorialAdmin(admin.ModelAdmin):
    fields = ["tutorial_title",
              #"tutorial_published",
              "tutorial_content"]

admin.site.register(Tutorial,TutorialAdmin)
And then refresh admin to see that column is now gone. So you can register whatever you need, in whatever order you like.
Another option we have is to modify how things are grouped together for organization purposes. In our case right now, we really don't have too many columns where things are confusing just yet, but eventually you might. So you can organize things for example by doing:
from django.contrib import admin
from .models import Tutorial


class TutorialAdmin(admin.ModelAdmin):

    fieldsets = [
        ("Title/date", {'fields': ["tutorial_title", "tutorial_published"]}),
        ("Content", {"fields": ["tutorial_content"]})
    ]

admin.site.register(Tutorial,TutorialAdmin)
One final thing I'd like to do is have the tutorial_published default to now. There may be times when I want to change the published date from now, but, most often, the published time will be whatever the current time is.
mysite/main/admin.py
tutorial_published = models.DateTimeField('date published', default=datetime.now)
Full script:
from django.db import models
from datetime import datetime

class Tutorial(models.Model):
    tutorial_title = models.CharField(max_length=200)
    tutorial_content = models.TextField()
    tutorial_published = models.DateTimeField('date published', default=datetime.now)

    def __str__(self):
        return self.tutorial_title
Now, for new tutorials, the date published field is auto-filled to be the current date.
But wait, there's more!
Remember what I was saying about Django being a collection of apps and part of what makes the abstraction that Django forces upon you awesome is that apps are highly modular? Let's see just how easy that can really be.
One thing my tutorials desperately could use is an editor, not really just some text field. I can write HTML in here, sure, but that would be rather tedious, especially if I made some typo and then I wouldn't see it until I push to publish it! Instead, I would like a WYSIWYG (what you see is what you get) editor. Luckily many of these exist within the Django ecosystem. The one I will make use of is a branch off of TinyMCE. To get it, we just need to do:
python3 -m pip install django-tinymce4-lite.
Now this is an app, so we need to add it to our INSTALLED_APPS in the mysite/mysite/settings.py file:
INSTALLED_APPS = (
    ...
    'tinymce',
    ...
)
Then, somewhere in the settings.py also add:
TINYMCE_DEFAULT_CONFIG = {
    'height': 360,
    'width': 1120,
    'cleanup_on_startup': True,
    'custom_undo_redo_levels': 20,
    'selector': 'textarea',
    'theme': 'modern',
    'plugins': '''
            textcolor save link image media preview codesample contextmenu
            table code lists fullscreen  insertdatetime  nonbreaking
            contextmenu directionality searchreplace wordcount visualblocks
            visualchars code fullscreen autolink lists  charmap print  hr
            anchor pagebreak
            ''',
    'toolbar1': '''
            fullscreen preview bold italic underline | fontselect,
            fontsizeselect  | forecolor backcolor | alignleft alignright |
            aligncenter alignjustify | indent outdent | bullist numlist table |
            | link image media | codesample |
            ''',
    'toolbar2': '''
            visualblocks visualchars |
            charmap hr pagebreak nonbreaking anchor |  code |
            ''',
    'contextmenu': 'formats | link image',
    'menubar': True,
    'statusbar': True,
    }
These are some configuration settings of what we might want to include. There are others you can add. See here for further configuration: TinyMCE4-lite configurations
Next, we need to add a pointer to the app so it can be referenced when we call it. To do this, let's now edit mysite/mysite/urls.py
urlpatterns = patterns('',
    ...
    path('tinymce/', include('tinymce.urls')),
    ...
)
Finally, we just need to make use of TinyMCE where we want it. To do this, we need to override a form to use our TinyMCE widget. In this case, it's not just any form, however, we want to use it within the admin page. To do this, go back into our mysite/main/admin.py file, and add the follwowing imports:
from tinymce.widgets import TinyMCE
from django.db import models
The first is for our widget, the second is so we can override one of our models fields (the textfield). To do this, we'll add:
    formfield_overrides = {
        models.TextField: {'widget': TinyMCE()},
        }
So the full script becomes:
mysite/main/admin.py
from django.contrib import admin
from .models import Tutorial


class TutorialAdmin(admin.ModelAdmin):

    fieldsets = [
        ("Title/date", {'fields': ["tutorial_title", "tutorial_published"]}),
        ("Content", {"fields": ["tutorial_content"]})
    ]

    formfield_overrides = {
        models.TextField: {'widget': TinyMCE()},
        }


admin.site.register(Tutorial,TutorialAdmin)
Now, refresh http://127.0.0.1:8000/admin/main/tutorial/add/
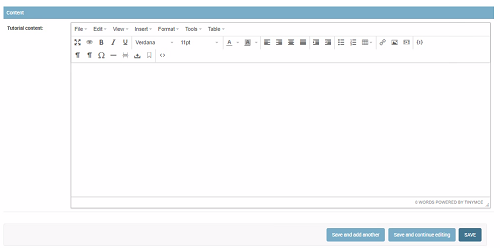
Awesome! So this editor allows us to more easily write HTML, insert code snippets...etc. We can also view the raw HTML and insert our own custom HTML as well if something we want doesn't exist in the editor.
While we're here, let's go ahead and add a quick tutorial with a code snippet just for kicks. Put whatever you want, give it a title, and save.
Let's now head back to our views to learn how our views can interact with our models, as well as how the Django templating works for displaying and working with python objects inside of HTML templates.
-
Django Web Development with Python Introduction
-
Models - Django Tutorial
-
Admin and Apps - Django Tutorial
-
Views and Templates - Django Tutorial
-
CSS - Django Tutorial
-
User Registration - Django Tutorial
-
Messages - Django Tutorial
-
User Login and Logout - Django Tutorial
-
Foreign Keys with Models - Django Tutorial
-
Working with Foreign Keys - Django Tutorial
-
Dynamic sidebar - Django Tutorial
-
Deploying to a Server - Django Tutorial
