CSS - Django Tutorial
Welcome to part 5 of the web development with Django and Python tutorial series. In this part, we're going to focus a bit on styling and design. Just like we have a web framework for Python, there are CSS frameworks (thankfully!)
The CSS framework that I currently use with this website is Materialize CSS, so I will just use that again here.
We have two options, we can either use their hosted version, or we can download a copy and modify it. To start, lets just use their hosted version, then we can get into modifying it. To use their CSS, we just need to bring it in inside the head tags of our home.html file. The Materialize CSS framework also comes with some javascript that we can make use of, so we will bring that in as well. All you need to know about CSS is that it is used to add certain stylistic elements to certain HTML objects. Javascript, in the context of a CSS framework, is for the same purpose, mainly to add a bit more flair and interactivity. Pretty much any time you have a webpage change dynamically without the URL changing, javascript was involved.
So, to begin, let's modify our mysite/main/templates/main/home.html head tags:
<head>
    {% load static %}
    <!-- Prism CSS -->
    <link href="{% static "tinymce/css/prism.css" %}" rel="stylesheet">
    <!-- Compiled and minified CSS -->
    <link rel="stylesheet" href="https://cdnjs.cloudflare.com/ajax/libs/materialize/1.0.0/css/materialize.min.css">
    <!-- Compiled and minified JavaScript for Materialize CSS -->
<script src="https://cdnjs.cloudflare.com/ajax/libs/materialize/1.0.0/js/materialize.min.js"></script>
</head>
Great, now refresh, and you will probably just notice that your font changed for the most part, but we've brought in quite a bit that we can use now. For example, let's check out cards. They've got the following code:
  <div class="row">
    <div class="col s12 m6">
      <div class="card blue-grey darken-1">
        <div class="card-content white-text">
          <span class="card-title">Card Title</span>
          <p>I am a very simple card. I am good at containing small bits of information.
          I am convenient because I require little markup to use effectively.</p>
        </div>
        <div class="card-action">
          <a href="#">This is a link</a>
          <a href="#">This is a link</a>
        </div>
      </div>
    </div>
  </div>
That makes these things called cards, so now let's try to incorporate this. Inside the row tags, let's setup our for loop:
  <div class="row">
    {% for tut in tutorials %}
        <div class="col s12 m6">
          <div class="card blue-grey darken-1">
            <div class="card-content white-text">
              <span class="card-title">Card Title</span>
              <p>I am a very simple card. I am good at containing small bits of information.
              I am convenient because I require little markup to use effectively.</p>
            </div>
            <div class="card-action">
              <a href="#">This is a link</a>
              <a href="#">This is a link</a>
            </div>
          </div>
        </div>
    {% endfor %}
  </div>
Next, let's replace the card title with our tutorial title, then move published date and the content in. For now, I will just remove the card action bits. So now we've got:
  <div class="row">
    {% for tut in tutorials %}
        <div class="col s12 m6">
          <div class="card blue-grey darken-1">
            <div class="card-content white-text">
              <span class="card-title">{{tut.tutorial_title}}</span>
              <p>{{tut.tutorial_published}}</p>
              <p>{{tut.tutorial_content|safe}}</p>
            </div>
          </div>
        </div>
    {% endfor %}
  </div>
Refresh our homepage, and now we've got:
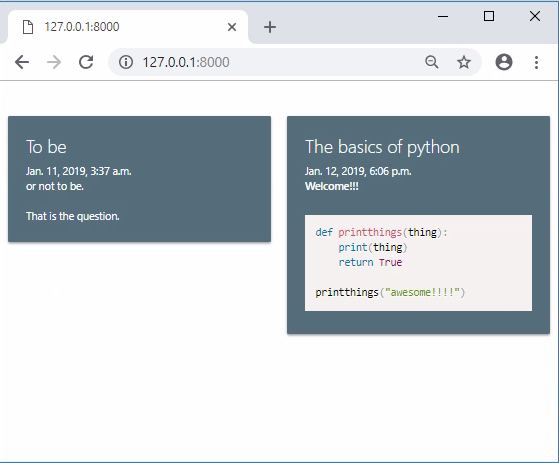
This is just a quick example of applying their CSS. It really is pretty simple to implement their elements. If you're unfamiliar with HTML/CSS there are tons of guides for it out there. I don't intend to really teach it here. Try resizing your window to be very thin, like on mobile. You should see that one of the cards pops down. This is one of the benefits of using the rows/columns structure. The class="col s12 m6" means on a small screen, this object takes up all 12 columns (12 is the max). On a medium screen, 6 columns per card, so we could fit 2 cards, and this will adjust dynamically. There's also a l option for large. So large is like full screen on a desktop, medium is tablets, and small is phone.
We can also add hoverable to our cards, for example:
<div class="card blue-grey darken-1 hoverable">
Try that, then hover over one of the cards, you should see it animate in such a way that it looks like it's lifting up. Next, lets make the published size slightly smaller:
<p style="font-size:70%">Published {{tut.tutorial_published}}</p>
Okay, that's enough styling for one day I'd say, good work everyone!
Next, we'd probably like to do something like add a navigation bar, maybe some sort of footer. The issue is, we'd like to have this on every page, not just the home page. But we have thousands of tutorials, each of which will get their own page. Imagine adding this to every page you create. Contact page, home page, tutorials page, about page...etc. Then, what if you changed something in the nav bar? Yikes! So, instead, with Django, we can use extends and includes. Let's start with an extends example. The way it works is we create a main type of page, then pages that will maybe modify some portion of that main page (like the body), will "extend" that main type of page. So what we'll do is just copy home.html, and call the copy header.html. In the header.html, replace everything in the body tags with:
  {% block content %}
  {% endblock %}
So now your mysite/main/templates/main/header.html file looks like:
<head>
    {% load static %}
    <!-- Prism CSS -->
    <link href="{% static "tinymce/css/prism.css" %}" rel="stylesheet">
    <!-- Compiled and minified CSS -->
    <link rel="stylesheet" href="https://cdnjs.cloudflare.com/ajax/libs/materialize/1.0.0/css/materialize.min.css">
    <!-- Compiled and minified JavaScript -->
    <script src="https://cdnjs.cloudflare.com/ajax/libs/materialize/1.0.0/js/materialize.min.js"></script>
</head>
<body>
  {% block content %}
  {% endblock %}
</body>

<!-- Prism JS -->
<script src="{% static "tinymce/js/prism.js" %}"></script>
Now we can modify mysite/main/templates/main/home.html to be:
{% extends 'main/header.html' %}

{% block content %}
  <div class="row">
    {% for tut in tutorials %}
        <div class="col s12 m6">
          <div class="card blue-grey darken-1 hoverable">
            <div class="card-content white-text">
              <span class="card-title">{{tut.tutorial_title}}</span>
              <p style="font-size:70%">Published {{tut.tutorial_published}}</p>
              <p>{{tut.tutorial_content|safe}}</p>
            </div>
          </div>
        </div>
    {% endfor %}
{% endblock %}
So the extends bit lets django templating know that this code is going to go where ever the block tags are on the template we're extending.
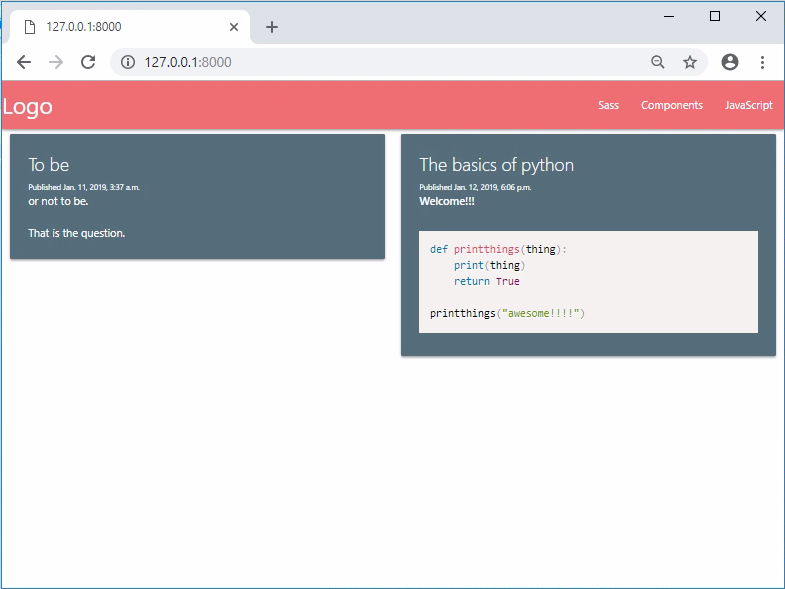
"Where's the nav bar you promised?!" Okay okay, settle down, no need to riot. Let's add that next. Here's the docs for the navbar: Materialize CSS Navbar
Here's the code for a navbar:
  <nav>
    <div class="nav-wrapper">
      <a href="#" class="brand-logo">Logo</a>
      <ul id="nav-mobile" class="right hide-on-med-and-down">
        <li><a href="sass.html">Sass</a></li>
        <li><a href="badges.html">Components</a></li>
        <li><a href="collapsible.html">JavaScript</a></li>
      </ul>
    </div>
  </nav>
Okay, easy enough, so we'll add this to our header.html file, inside the body tags:
<head>
    {% load static %}
    <!-- Prism CSS -->
    <link href="{% static "tinymce/css/prism.css" %}" rel="stylesheet">
    <!-- Compiled and minified CSS -->
    <link rel="stylesheet" href="https://cdnjs.cloudflare.com/ajax/libs/materialize/1.0.0/css/materialize.min.css">
    <!-- Compiled and minified JavaScript -->
    <script src="https://cdnjs.cloudflare.com/ajax/libs/materialize/1.0.0/js/materialize.min.js"></script>
</head>


<body>
  <nav>
    <div class="nav-wrapper">
      <a href="#" class="brand-logo">Logo</a>
      <ul id="nav-mobile" class="right hide-on-med-and-down">
        <li><a href="sass.html">Sass</a></li>
        <li><a href="badges.html">Components</a></li>
        <li><a href="collapsible.html">JavaScript</a></li>
      </ul>
    </div>
  </nav>
  {% block content %}
  {% endblock %}
</body>

<!-- Prism JS -->
<script src="{% static "tinymce/js/prism.js" %}"></script>
Let's change the URLs to be something more related to what we're doing here: home, community, register, and login:
<head>
    {% load static %}
    <!-- Prism CSS -->
    <link href="{% static "tinymce/css/prism.css" %}" rel="stylesheet">
    <!-- Compiled and minified CSS -->
    <link rel="stylesheet" href="https://cdnjs.cloudflare.com/ajax/libs/materialize/1.0.0/css/materialize.min.css">
    <!-- Compiled and minified JavaScript -->
    <script src="https://cdnjs.cloudflare.com/ajax/libs/materialize/1.0.0/js/materialize.min.js"></script>
</head>


<body>
  <nav>
    <div class="nav-wrapper">
      <a href="/" class="brand-logo">Tutorials</a>
      <ul id="nav-mobile" class="right hide-on-med-and-down">
        <li><a href="/">Home</a></li>
        <li><a href="https://discord.gg/sentdex">Community</a></li>
        <li><a href="/login">Login</a></li>
        <li><a href="/register">Register</a></li>
      </ul>
    </div>
  </nav>
  {% block content %}
  {% endblock %}
</body>

<!-- Prism JS -->
<script src="{% static "tinymce/js/prism.js" %}"></script>
We obviously haven't yet built out these links yet, but we'll do it eventually!
So the next thing is... I don't want these colors, I want the colors from PythonProgramming.net. How can we go about doing this? We can go the Sass route. If you don't care, about this, you do not need to follow from here. We're only going to be changing the default colors for the rest of the tutorial here.
Head to the getting started section and then choose the source download under "Sass" to get a .zip file.
Extract the zip file.
Navigate into the folder, and into the materialize-src directory.
Then click sass > components.
Now, since we're just going to fiddle with the colors, open up: _color-variables.scss, using sublime text. In here, we can adjust the main colors used. This could take a lot of time, so I am just going to share the changed file, but you can feel free to change the colors and fiddle around. There are many hex color code color pickers online to help you with this.
Here's my version of the color variables file: _color-variables.scss.
Once you have your variables set, you're ready to compile to CSS. To do this, you need a Sass compiler. I personally used Koala. Download that, install.
For some reason, the drag and drop doesn't work for me on Windows. Worked fine on Mac. On Windows, I just use the + button on the top left. Navigate to the Materialize-src folder and open that. Then, you can click once on the materialize-src/sass/materialize.scss to choose it, then click compile on the bottom right.
Now you can navigate to the materialize-src/css section to grab your customized materialize.css file. Great!
Now let's take that and place it into mysite/main/static/main/css/materialize.css. Once that's done, let's reference this new css rather than the hosted one. Go into your mysite/main/templates/main/header.html and swap the hosted CSS for:
<link rel="stylesheet" href="{% static "main/css/materialize.css" %}">
Refresh the homepage and now the navbar, for example, should be a different color. I am going to go ahead and change the color of the cards now to the default white, editing mysite/main/templates/main/home.html:
{% extends 'main/header.html' %}

{% block content %}
  <div class="row">
    {% for tut in tutorials %}
        <div class="col s12 m6">
          <div class="card hoverable">
            <div class="card-content">
              <span class="card-title">{{tut.tutorial_title}}</span>
              <p style="font-size:70%">Published {{tut.tutorial_published}}</p>
              <p>{{tut.tutorial_content|safe}}</p>
            </div>
          </div>
        </div>
    {% endfor %}
{% endblock %}
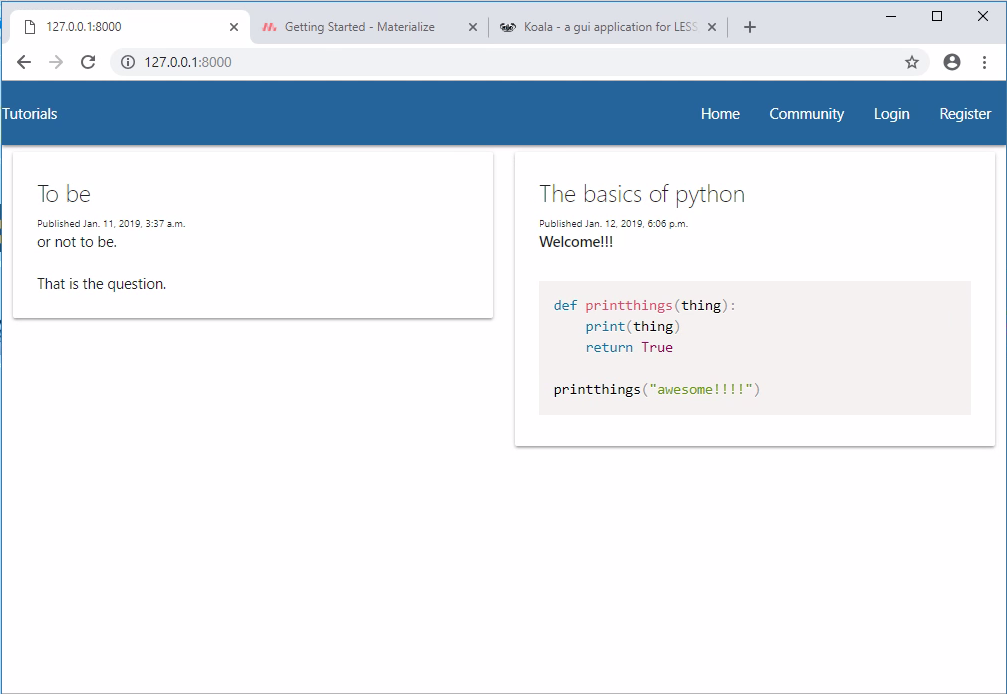
Not bad, and, while this isn't a great looking website still, this is at least better than what we had! We could continue to build it out stylistically, but I know that's not why you are all here, so, maybe later on in the series, but let's get back to to the Django stuff!
Next up, users!
-
Django Web Development with Python Introduction
-
Models - Django Tutorial
-
Admin and Apps - Django Tutorial
-
Views and Templates - Django Tutorial
-
CSS - Django Tutorial
-
User Registration - Django Tutorial
-
Messages - Django Tutorial
-
User Login and Logout - Django Tutorial
-
Foreign Keys with Models - Django Tutorial
-
Working with Foreign Keys - Django Tutorial
-
Dynamic sidebar - Django Tutorial
-
Deploying to a Server - Django Tutorial
