Deploying to a Server - Django Tutorial
Welcome to part 12 of the Django tutorials. In this tutorial, we're going to focus on the deployment of a Django website. There are many steps involved with setting up just about any web server including steps for added security, improved performance, and more. We could dedicate an entire series to this process alone. If there's interest for that, I can do that, but, for now, my goal is to condense this enough to just one tutorial.
We're going to be using Linode as our host here. I have been using Linode for almost a decade, this website has been hosted on them for almost as long. They are also a sponsor for this series, so thank you Linode! If you want to support me while using a high quality host, check out the to get started.
To begin, we need a server to host our website on. You could do this from home, but, most likely, you'll want something with a bit better reliability. When I hosted things from home, I saw more like 90% reliability. Things like power power outages and times of heavy traffic would cause trouble. Then, looking for servers, there are places like Heroku or PythonAnywhere, where you can host your websites for free, or for cheap, with the added benefit of having very quick and easy ways to deploy something like a Django app.
The main issue I have with these types of websites is when it comes to scaling and further customization. Moving off of these services can often be a huge pain. I have used both services, and at one time I was one of the top resource users at PythonAnywhere. Now, I am sure lots have changed with both services since I last used them, things are always improving, but I think it's often best to have your own server, which you have root/sudoer access to. If you're just looking for a quick way to share your web application with others, or so you can access it publicly away from home, then check out those two services, or something like them. If you're looking to actually deploy something to be used by many users, which you will need to scale out, then you may want to dig deeper.
So, we need some server, which will almost certainly be running a linux operating system, such as Ubuntu. You can either get a truly dedicated server, or something called a VPS (virtual private server). For VPS providers, I have made use of Google, Digital Ocean, Linode, AWS, Paperspace, and a bunch of others. Various hosts have various benefits. When just starting out, I'd recommend a simpler-to-use host like Google, Linode, or Digital Ocean. I personally find AWS very tedious to use, and I know to some extent what I am doing. I've been with Linode for the longest, almost a decade now, and Linode is what I use to host this website, so that's what I'll be using here. You can use my referral code for Linode to get $20 to start with, though you will still need to sign up with a valid credit card so they know you're not just constantly creating new accounts $20 at a time:
The smallest $5/month server is more than enough for our needs here, so the referral code should last you a few months.
Once you have that server, we need Django and then we need a web server to actually handle requests and such. Up to this point, we've been using the built-in Django testing webserver, but this is not suitable for production both in terms of security and performance/scale. Instead, you're looking at something like Apache or Nginx. Initial setup on various VPS providers is going to vary, but, on Linode, we'll start by creating and account/logging in going to the cloud manager dashboard, then clicking the "create" button, and then "linode." The term "linode" is used for a typical VPS here.
Next, we choose an image. I am going to use Ubuntu 18.04 LTS here for the long term support and upgrade-ability down the road. Next, pick a region. Pick something either close to you or close to your average user. I'll go with Dallas.
Next, pick the plan. I am going to go with the Nanode type, with 1gb of ram, 1 cpu (1 core, basically), and 25gb of storage. This should be enough for testing.
Now we will give our linode a label if we want, then set a root user password.
The last thing you may want to consider is setting backups. I can say this: I have never regretted setting up backups. You can disable them later. They are often not worth the cost compared to doing automated backups yourself, but you have to do that first. Til then, let your host do backups if it's an option!
Set up the server, and this will take a few moments. Once done, you're ready to connect to your server. To connect to our server, we're going to use SSH. On Mac and Linux, this is as simple as starting by opening your terminal. On Windows, you will need to instead open your powershell, or use a third-party program like PuTTY (which is still useful, because you can also save various connections as profiles). For now, I would just recommend you use powershell though if you're on Windows.
In your terminal/powershell, you will need to type: ssh root@YOUR.VPS.IP.ADDR. To get your IP address, just head to cloud.linode.com and look for the IP address of your new server. It should look something like this:

So my IP address is 50.116.18.101. To connect then I type:
ssh root@50.116.18.101
If this is your first ever time connecting to this server, you will see a message like:
The authenticity of host '50.116.18.101 (2300:2c00::f05c:92ff:fe84:196d)' can't be established.
ECDSA key fingerprint is SHA256:MeZ8pafsfSF!2fff6XRJbP/HelzorT.
Are you sure you want to continue connecting (yes/no)?
Type yes
On initial login, you should see something like:
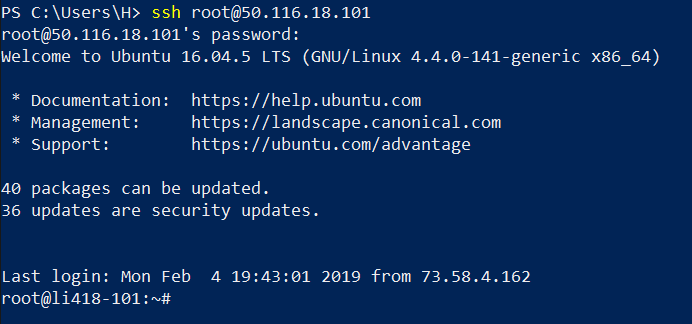
Now, you're connected! So for many of you, this might be an entirely new, unfamiliar, and uncomfortable experience. You will be interacting entirely with this machine through the shell like this, all in text...no desktop...etc. For many of you as well, not only is it a new way of interacting with a machine, it's probably a foreign operating system (linux). It's just plain going to be a learning process. Don't feel like you need to learn everything here at once. I will explain the commands that we're doing, but the objective here is to set everything up. If you want to learn Linux and the shell, you may want to find a tutorial dedicated to that specifically.
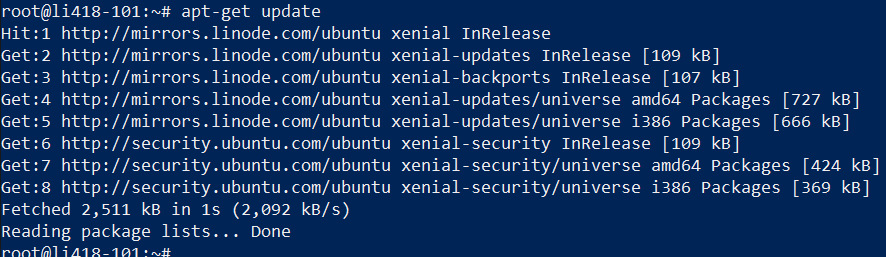
We're ready to start issuing commands. The first one is an update for apt, which is your advanced package tool. This is what we use to install, update, and remove packages. Like pip for Python. First, let's run an update:
apt-get update
With current versions of Ubuntu, you should have python 3 already. Type in python3 to confirm that you're running python 3. In this case, we have Python 3.5. That's fine for now. If you want to upgrade Python 3, have at it, but I am trying to stuff all this into one tutorial.
What we will need is pip for python 3:
apt-get install -y python3-pip
Then let's update pip:
python3 -m pip install --upgrade pip
Now we can install django and the tinymce app that we used so far:
python3 -m pip install django django-tinymce4-lite
Now let's make our web dir:
mkdir /var/www
Then change directory into that:
cd /var/www
Now, let's make a quick demo django project to see how things work:
django-admin startproject mysite
Change directory into that project:
cd mysite
Next, we're going to edit the settings.py file, using the editor called nano.
nano mysite/settings.py
The biggest thing is to turn off DEBUG, setting this to False.
Next, we want to set the hostname. This might be your domain name, but, again, I am not going to get into pointing a domain name here. To do it, you'd make a domain name, point that domain name to linode's nameservers, then setup that domain to point to your linode on linode.com. That's the 1-sentence run down, should you want to do it! Linode, however, will give you a temporary domain name as well though. To find it, go to your Linodes section and click on your new linode. From here, go to the networking tab, and there you will find your hostname:
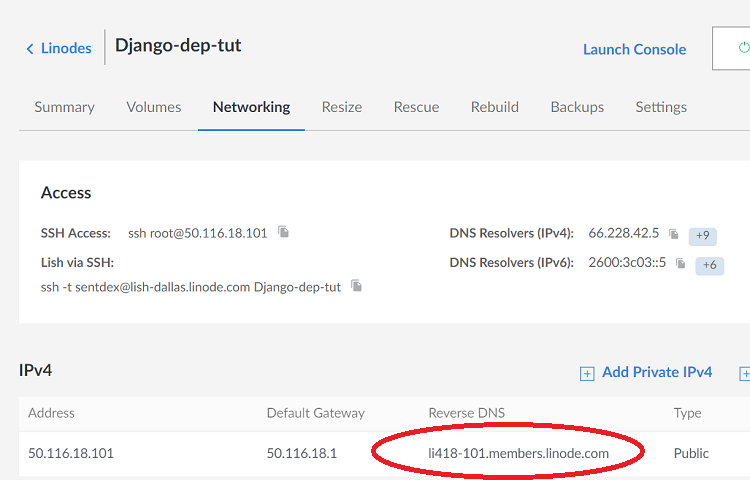
So mine is li418-101.members.linode.com
Back into our settings.py, I will paste that into my ALLOWED_HOSTS list:
ALLOWED_HOSTS = ["li418-101.members.linode.com"]
Now, control+x to exit, y to save, enter to keep the filename.
Next, we will make a quick app to test to make sure the basic Django installation works. The one we saw before when we just made a project and ran it was based on DEBUG being set to true. We'd still like to know if things are working though, so a quick app will do!
python3 manage.py startapp it_works
Then we will point our main/urls.py to this app:
nano mysite/urls.py
from django.contrib import admin
from django.urls import path, include

urlpatterns = [
    path('', include('it_works.urls')),
    path('admin/', admin.site.urls),
]
Exit and save (ctrl+x, y, enter). Now we have to make that urls.py:
nano it_works/urls.py
from django.urls import path
from . import views

app_name = 'it_works'

urlpatterns = [
    path("", views.homepage, name="homepage"),
]
nano it_works/views.py
from django.http import HttpResponse
def homepage(request):
    return HttpResponse("It works! (served from Django)")
Okay, the Django bits are all setup, and now we need to install/setup our web server WSGI. The web server is the thing that helps us communicate with outside traffic, handling requests and such. WSGI, standing for Web Server Gateway Interface is software that serves as the intermediary between our web server and your Django code.
apt-get install -y apache2 libapache2-mod-wsgi-py3
Now let's setup the apache config file for our website:
nano /etc/apache2/sites-available/mysite.conf
Filling that with:
<VirtualHost *:80>
    ServerName YOURHOSTNAME

    ErrorLog ${APACHE_LOG_DIR}/mysite-error.log
    CustomLog ${APACHE_LOG_DIR}/mysite-access.log combined

    WSGIDaemonProcess mysite processes=2 threads=25 python-path=/var/www/mysite
    WSGIProcessGroup mysite
    WSGIScriptAlias / /var/www/mysite/mysite/wsgi.py

    Alias /robots.txt /var/www/mysite/static/robots.txt
    Alias /favicon.ico /var/www/mysite/static/favicon.ico
    Alias /static/ /var/www/mysite/static/
    Alias /static/ /var/www/mysite/media/

    <Directory /var/www/mysite/mysite>
        <Files wsgi.py>
            Require all granted
        </Files>
    </Directory>

    <Directory /var/www/mysite/static>
        Require all granted
    </Directory>

    <Directory /var/www/mysite/media>
        Require all granted
    </Directory>
</VirtualHost>
Note that you must change YOURHOSTNAME to your hostname.
Short explanation of what we're doing here:
- `ServerName hostname` - replace `hostname` with your current hostname. That's the line that "tells" Apache to use this configuration when given domain/hostname is used in a request (eg. when you run http://hostname in a browser)
- `ErrorLog` and `CustomLog` are default log configuration lines for Apache, we just want to save logs for that `vhost` in separate files
- `WSGIDaemonProcess`, `WSGIProcessGroup` and `WSGIScriptAlias` sets our `WSGI` mod - in our configuration we want to have 2 processes with 25 threads each and `/var/www/mysite` as a current working directory (that's a path where we have all files and folders fof our website), then we are instructing Apache to use `/var/www/mysite/mysite/wsgi.py`, file created for us by Django, to serve website under `/` (root path) - treat this `wsgi.py` file like entry point for your project
- `Alias` lines set associations between different files and folders we need in a root of our domain to actual files and folders in a filesystem structure, so for example it says: if browser asks for `http://hostname/robots.txt`, it's here: `/var/www/mysite/static/robots.txt` - return it's content. We want to set those aliases for static files, that are actually saved on a disk only, all dynamic pages generated by Django are going to be served from Python script (using `wsgi.py` entry point)
- last lines are here to set permissions for Apache to open files and folders from given locations
Save and exit.
rm /etc/apache2/sites-available/000-default.conf
nano /etc/apache2/sites-available/000-default.conf
<VirtualHost *:80>
    ServerName _
    Redirect 404 /
</VirtualHost>
Save and exit.
The above just ensures that, if our hostname doesn't match, we return a 404.
Now enable our new site and reload apache:
a2ensite mysitesystemctl reload apache2
Alright, head to your hostname in a browser and view your work! You should see something like:

Cool, but we've got our project that we've been working on so far, so let's bring that in! Since I am already hosting our project files, I am just going to download from there. You can also use SCP to move your own projects. You can use SCP on terminal in mac/linux, or with powershell in Windows. You can also download a GUI-based SCP program called WinSCP, which you may find more noob-friendly since you can just drag and drop your files, and, like PuTTY, you can save profiles.
For this tutorial's sake, I am just going to grab my zipped file that I have hosted.
cd /var/www/
wget https://pythonprogramming.net/static/downloads/django-tutorials/django-11.zip
wget is used to download files. Now we want to unzip these:
apt-get install unzip
Then, let's remove the old mysite that we made:
rm -r mysite/
rm is remove, the -r is recursive (so remove everything in there).
Next, let's unzip our tutorial code:
unzip django-11.zip
Okay, great! Now we just need to turn off DEBUG and set the hostname again, then reload apache.
nano mysite/mysite/settings.py
Set DEBUG = False and add your hostname.
Then scroll to the end of the file, you should find STATIC_URL = '/static/', add right below it:
STATIC_ROOT = '/var/www/mysite/static/'
MEDIA_URL = '/media/'
MEDIA_ROOT = '/var/www/mysite/media/'
Exit that, and now we need to run:
python3 manage.py collectstatic
This will copy all of your static files to one spot for production.
service apache2 reload
Check to see if things are working!
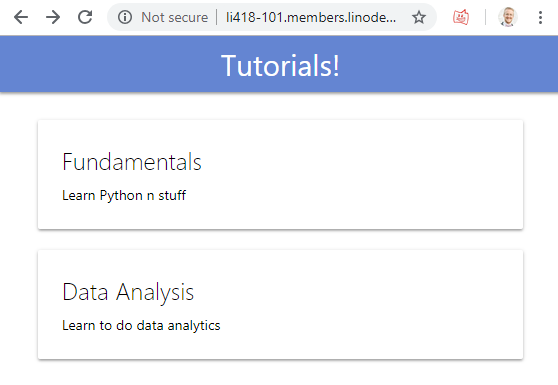
Awesome!
One thing some people pointed out up to this point however is that... suddenly the paths for our login, register, and logout don't work!
This is because of our trailing slash. Let's remove those.
nano mysite/main/urls.py
from django.urls import path
from . import views

app_name = "main"

urlpatterns = [
    path("", views.homepage, name="homepage"),
    path("register", views.register, name="register"),
    path("logout", views.logout_request, name="logout"),
    path("login", views.login_request, name="login"),
    path("<single_slug>", views.single_slug, name="single_slug"),
]
Exit and save. Reload apache. Try the methods again.
Finally, we can try to login, but we find that we can't because our database is read-only for our user. In this case, using apache, our "user" is www-data. We need to give this user permission to edit these files for us. To do that:
cd /var/www/
chown www-data mysite/
Then:
chown www-data mysite/db.sqlite3
Let's run a
service apache2 reload
Now we can interact with our database. I think we're all set!
-
Django Web Development with Python Introduction
-
Models - Django Tutorial
-
Admin and Apps - Django Tutorial
-
Views and Templates - Django Tutorial
-
CSS - Django Tutorial
-
User Registration - Django Tutorial
-
Messages - Django Tutorial
-
User Login and Logout - Django Tutorial
-
Foreign Keys with Models - Django Tutorial
-
Working with Foreign Keys - Django Tutorial
-
Dynamic sidebar - Django Tutorial
-
Deploying to a Server - Django Tutorial
