Object Oriented Programming Crash Course with Tkinter
Learning OOP with Python 3
You do not need to be following along our Tkinter series to participate in this tutorial. If you are here purely to learn Object Oriented Programming, that is fine.
With our program in mind, it has become time that we consider Object Oriented Programming (OOP) to achieve our back-end goals. Up until this point, my tutorials have excluded object oriented programming for the most part. It's just not generally my style, and often times complicates the learning of the specific topic by adding another layer of complexity in the form of obfuscation to the task.
For those of you who are unfamiliar with, or confused by, what object oriented programming actually is, you are not alone. Even people who use it do not usually fully understand the inner workings sometimes. I do not consider myself an OOP expert, especially since I rarely use it, but I know enough to know it will help us out here in the long run with our Tkinter application and I can share what I do know for you fine folks!
So, Object Oriented Programming is a programming paradigm, or better put: a structure. That's it. It's just a structure with which we build a program. Python is often treated purely as a scripting language, but it is fundamentally an OOP language, actually.
With OOP, you basically state the structure of your program, and your classes quite literally return "objects," which is why it is called "object" oriented. The objects serve as "instances" of your classes. That's about all I want to say on the matter before we just jump into an example. I think a practical example goes a long way in helping to learn, so let's get into it!
I will share the code in chunks, explaining each step of the way. If you get lost, I will post the "full" version of this series' code at the very bottom, so fear not!
import tkinter as tk

class SeaofBTCapp(tk.Tk):
We begin with a simple import of tkinter as tk. If you are using Python 2, keep in mind that tkinter is called Tkinter.
After that, we define our SeaofBTCapp class, and we pass tk.Tk as what looks to be what we know as a parameter. First off, there is no need for any parenthesis at all with classes. I could do class SeaofBTCapp: and that would not be a syntax error. So what is tk.Tk then? When you see something in parenthesis like this, what it means is that class is inheriting from another class. In our case, we're inheriting everything from the tk.Tk class. Think of it kind of like how you import modules to use them. That's basically what's happening when you inherit, only at the local class level.
Now, within our class, we have:
def __init__(self, *args, **kwargs):
While not required, you will often see the first "function" in classes as __init__. First off, these are not functions, even though they act just like functions. They are actually called "methods." __init__ is a very special method, in that this method always runs. Init is short of initialize, and whatever you put in here is going to always run whenever the class is called upon. The other methods will only run when you specifically call upon them to run. Think of this like the various startup processes that run on your computer when you have booted up. You want some things to always start when your computer turns on. You want your mouse drivers to come online, you need your keyboard to work, you want your graphics drivers pumping out your desktop, and so on. The other programs you might have, you just want them to start when you click on their icon. These are like the other methods.
Now that we have that down, we see the first parameter in "init" is "self." This is done purely out of standards, and is actually not required. You do not need it, and you could call it something else entirely, like "burrito." It's a good idea to just call it "self" since that is the accepted practice. If your goal is obfuscation, however, you might rename it. So, self is just the first argument of all class methods. Then you see we're calling these "*args" and "**kwargs."
Like "self," actually typing out "args" and "kwargs" is not necessary, the asterisks to the trick. It is just common to add the "args" and "kwargs." So what are these? These are used to pass a variable, unknown, amount of arguments through the method. The difference between them is that args are used to pass non-keyworded arguments, where kwargs are keyword arguments (hence the meshing in the name to make it kwargs). Args are your typical parameters. Kwargs, will basically be dictionaries. You can get by just thinking of kwargs as dictionaries that are being passed.
So, in theory, you could have a method or function that was something like def example(farg, *, **). Fargs are required, as you likely know by now, and will throw an error if there is nothing assigned for them.
Next up, we have the following line under the def __init___:
tk.Tk.__init__(self, *args, **kwargs)
Here we're initializing the inherited class.
Now for some quick Tkinter-specific code:
        container = tk.Frame(self)
        container.pack(side="top", fill="both", expand=True)
        container.grid_rowconfigure(0, weight=1)
        container.grid_columnconfigure(0, weight=1)
We've defined this container, which will be filled with a bunch of frames to be accessed later on.
Next, we have container.pack. In Tkinter, there are two major ways of populating and situating your widgets that you create within the frame. One way is pack, the other is grid. Depending on your needs and what you're comfortable with, you will likely use one more than the other. For the most part, I find that grid gives me the most control over my application. Grid allows you to create a sort of grid, which is used for orienting where things go in your application. Pack allows some control, but mostly feels to me like you're just stuffing things into a pillow case, just trying your best to pick a side, but it doesn't always work as intended.
The grid_configure options are just some simple config settings that we're setting early on.
        self.frames = {}
        frame = StartPage(container, self)
        self.frames[StartPage] = frame
We pre-defined a dictionary, which is empty for now. Remember earlier about dictionaries and kwargs? Where do you think this dictionary will go?
Next, we define what the frame will be. Eventually, we're going to pack self.frames with a bunch of possible frames, with the "top" frame being the current frame. For now, we're just going to have one page, which is "StartPage" (not yet defined).
Next, still under __init__, we have:
frame.grid(row=0, column=0, sticky="nsew")
Here, we're using grid to place our widget. Row and column are both 0 for this widget. Then we have sticky being nsew. "nsew" corresponds to directions (north, south, east, west). The idea of sticky is like alignment, with a slight change of stretching. So if you aligned something e, then the widget would be to the right. If you said sticky="ew," then the widget would stretch from the left to right side. If you sticky "nsew" like we have, then the widget will be encouraged to fill the entire space allotted.
self.show_frame(StartPage)
Finally, we call show_frame, which is a method we've yet to define, but it will be used to bring a frame of our choosing, so let's create that method:
    def show_frame(self, cont):
        frame = self.frames[cont]
        frame.tkraise()
Another method, with self and an argument of cont for controller.
Then, we define frame as being the self.frame (which is that dictionary above), followed by the controller, which is the key to the value in our dictionary that is our frame.
Finally, we do frame.tkraise(), which will bring our frame to the top for the user to see.
Great, our back-end is basically all set. Now let's make that starting page.
class StartPage(tk.Frame):
def __init__(self, parent, controller):
tk.Frame.__init__(self, parent)
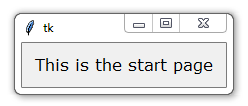
label = tk.Label(self, text="This is the start page", font=LARGE_FONT)
label.pack(pady=10,padx=10)
Here, we've got the StartPage class, inheriting from tk.Frame.
We then have a typical __init__, with the init of tk.Frame as well.
Then we define a label widget, which is Tkinter code. You'll see that for "font," we're calling Large_Font. This is a constant that we'll just put at the top of our application.
So, after you've called tkinter to be imported, add:
LARGE_FONT= ("Verdana", 12)
Now, back to our StartPage class.
We are using .pack, with some padding on the y and x. Padding just adds some empty spaces on the edges of things to help things not look so cluttered.
Finally, at the end of our script, we just need:
app = SeaofBTCapp()
app.mainloop()
App is the object of the SeaofBTCapp class, then we run .mainloop(), which is a tkinter functionality, yet we can use it due to inheritance.
And you're all done! Go ahead and run the script and you should see:
The full script:
import tkinter as tk

LARGE_FONT= ("Verdana", 12)

class SeaofBTCapp(tk.Tk):

    def __init__(self, *args, **kwargs):

        tk.Tk.__init__(self, *args, **kwargs)
        container = tk.Frame(self)

        container.pack(side="top", fill="both", expand = True)

        container.grid_rowconfigure(0, weight=1)
        container.grid_columnconfigure(0, weight=1)

        self.frames = {}

        frame = StartPage(container, self)

        self.frames[StartPage] = frame

        frame.grid(row=0, column=0, sticky="nsew")

        self.show_frame(StartPage)

    def show_frame(self, cont):

        frame = self.frames[cont]
        frame.tkraise()


class StartPage(tk.Frame):

    def __init__(self, parent, controller):
        tk.Frame.__init__(self,parent)
        label = tk.Label(self, text="Start Page", font=LARGE_FONT)
        label.pack(pady=10,padx=10)


app = SeaofBTCapp()
app.mainloop()
I will admit, at this point, it might feel like Tkinter is going to be super hard to work with, and we could have created the window that we just created MUCH more easily. I want to stress that what we mostly did here is lay some foundation for expansion. We've now got a back-end that will very easily allow us to add more and more pages, so, in the future, adding pages is as simple as creating another Class just like StartPage, adding navigation to it, and you're set.
There exists 3 quiz/question(s) for this tutorial. for access to these, video downloads, and no ads.
-
Programming GUIs and windows with Tkinter and Python Introduction
-
Object Oriented Programming Crash Course with Tkinter
-
Passing functions with Parameters in Tkinter using Lambda
-
How to change and show a new window in Tkinter
-
Styling your GUI a bit using TTK
-
How to embed a Matplotlib graph to your Tkinter GUI
-
How to make the Matplotlib graph live in your application
-
Organizing our GUI
-
Plotting Live Updating Data in Matplotlib and our Tkinter GUI
-
Customizing an embedded Matplotlib Graph in Tkinter
-
Creating our Main Menu in Tkinter
-
Building a pop-up message window
-
Exchange Choice Option
-
Time-frame and sample size option
-
Adding indicator Menus (3 videos)
-
Trading option, start/stop, and help menu options
-
Tutorial on adding a tutorial
-
Allowing the exchange choice option to affect actual shown exchange
-
Adding exchange choice cont'd
-
Adding exchange choices part 3
-
Indicator Support
-
Pulling data from the Sea of BTC API
-
Setting up sub plots within our Tkinter GUI
-
Graphing an OHLC candlestick graph embedded in our Tkinter GUI
-
Acquiring RSI data from Sea of BTC API
-
Acquiring MACD data from Sea of BTC API
-
Converting Tkinter application to .exe and installer with cx_Freeze
