Building Autonomous / RC car intro
You may think creating an autonomous car is a long way from where you are now, but it's not too far. You can break robotics down, just like programming, to extremely simple elements. Our car is no different, albeit our car will be very basic.
We're going to use combinations of GPIO pins to control four motors. The added layer of complexity will be an added H-bridge board, which will allow us to utilize forward and reverse with our motors. With four motors capable of forward and reverse, we can make a car with fixed wheels go forward, reverse, turn left, turn right, or pivot in place clockwise / counter clockwise.
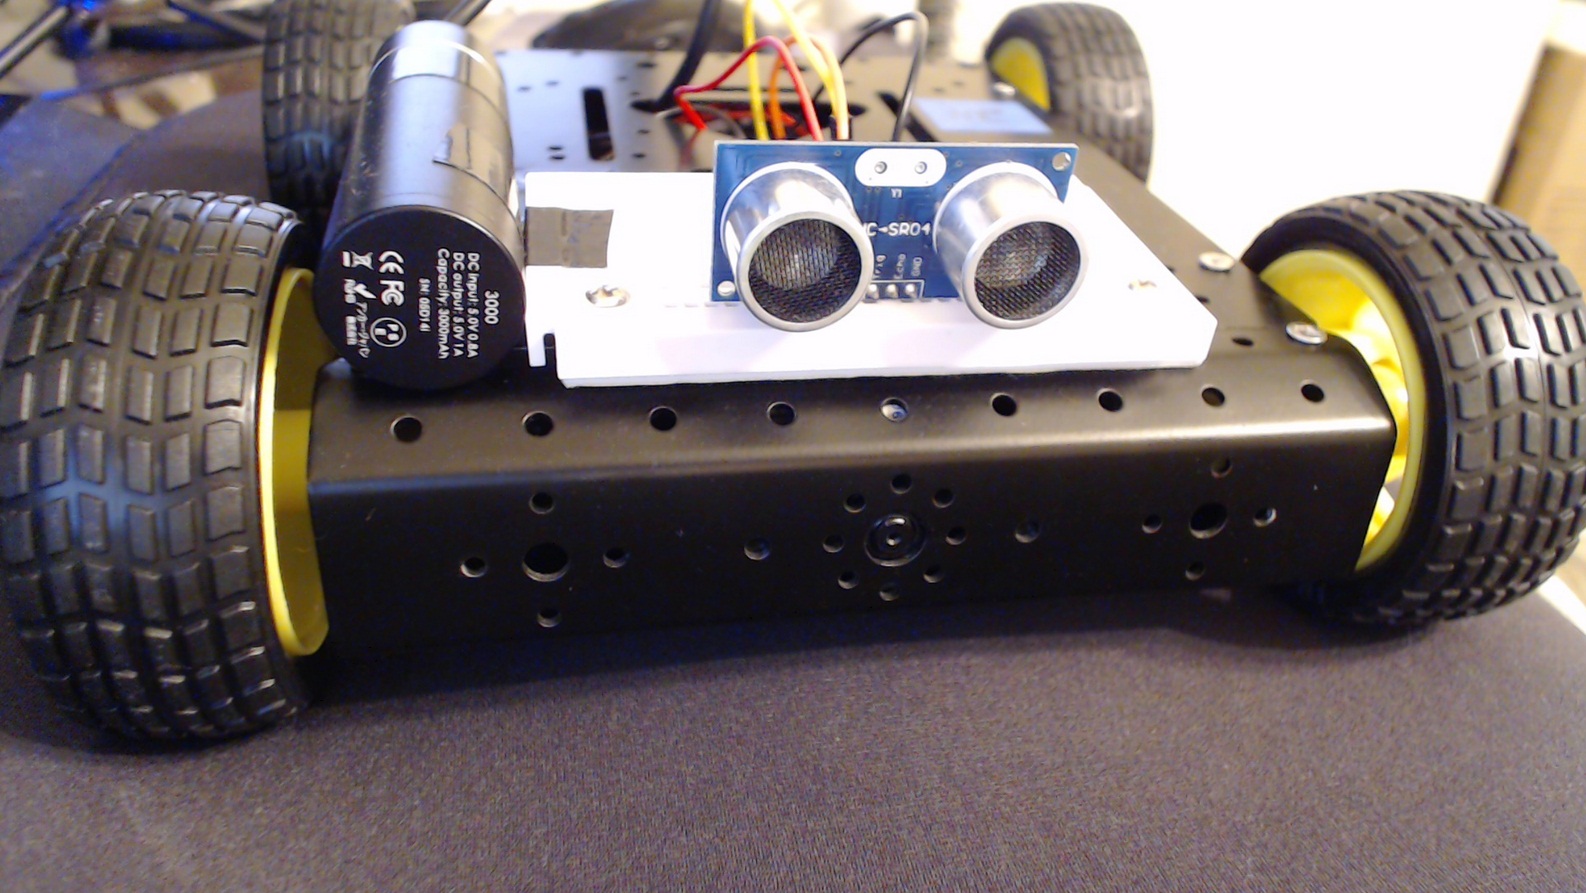
After that, we're going to bring in the HC SR04 distance sensor, reading values from that into our program. We can use this distance sensor to move our car into autonomy. If we had two, we could have one on the front, one at the rear, and our car would (almost) never hit anything. Even just one on the front is fairly successful, but we hit the back end fairly often.
Let's get started, first order of business: Supplies needed.
-
Robotics with the Raspberry Pi
-
Programming GPIO example
-
Running GPIO
-
Building Autonomous / RC car intro
-
Supplies needed
-
Motor Control
-
Connecting the four motors
-
Forward and Reverse
-
Turning
-
Pivoting
-
User Control
-
Remotely controlling the car
-
Adding a distance sensor (HC-SR04)
-
Programming with the distance sensor
-
Autopilot and/or auto-correct
-
Autonomous Beginnings
-
Testing Autonomous Code
-
Streaming video example one
-
Less latency streaming option
