Packaging and Deployment (PyInstaller, Buildozer) - Kivy with Python Tutorials
Alright, now comes the moment of truth: Packaging! Packaging is what turned me off to Kivy many years ago. Let's see how it is today. Kivy provides instructions for packaging your Kivy app by OS, but I have found that often more steps are needed and it can be hard to debug! As I learn more about solving for issues with Kivy packaging, I will update this page.
Windows
To start, Let's do Windows. Should be easy, right? Just use PyInstaller.
Do a pip install pyinstaller. Now, make some new directory and place the kivy python file and the socket_client.py file in it. Then, open a command line, head to this directory, and run:
py -3.7 -m PyInstaller --name chat chat_app.py
...assuming chat_app.py is the name of your Kivy chat application's python code!
At least for me, I got an error about making a window with Python 3.7.
CRITICAL] [App ] Unable to get a window, abort.
So then I downgraded to 3.6, installed Kivy there and PyInstaller, tried again. This time getting:
Fatal Python error: initfsencoding: unable to load the file system codec
ModuleNotFoundError: No module named 'encodings'
So then I did a py -3.6 -m pip uninstall enum...and tried again to convert the app.
Hey it worked! Woo. To use your app, head into the dist/APPNAME directory, then run your appname's .exe file. Should be all set.
Having trouble? Tell us about it on discord.gg/sentdex
Linux
Alright, how about.... Linux?
Add the kivy repo, install kivy, run the app, that works. Let's try to package! Oh, there's none. Guess you'll just have to use a shell script or something to install the things then run. Oh well....but you'll need it for Android!
Android
Okay, fine. The one I really care about anyways: Android!
First, you need to setup Kivy for Linux:
Next, we need buildozer.
sudo python3 -m pip install buildozer
cd project dir
buildozer init
Next, grab buildozer dependencies.
Even after these dependencies, I got the following errors:
sh.ErrorReturnCode_127:
  RAN: /home/h/Desktop/convert_me/.buildozer/android/platform/build/build/other_builds/libffi/armeabi-v7a__ndk_target_21/libffi/autogen.sh

  STDOUT:
/home/h/Desktop/convert_me/.buildozer/android/platform/build/build/other_builds/libffi/armeabi-v7a__ndk_target_21/libffi/autogen.sh: 2: exec: autoreconf: not found


  STDERR:

# Command failed: /usr/bin/python3 -m pythonforandroid.toolchain create --dist_name=myapp --bootstrap=sdl2 --requirements=python3,kivy --arch armeabi-v7a --copy-libs --color=always --storage-dir="/home/h/Desktop/convert_me/.buildozer/android/platform/build" --ndk-api=21
So then I grabbed 3 more dependencies:
sudo apt-get install automake autoconf libltdl-dev
Then you can run buildozer android debug deploy run as the Kivy docs suggest, but I found that this was hanging. I searched, searched and searched, and found someone suggesting we use a -v flag so that we can see the error output. So the command instead is:
buildozer -v android debug deploy run
...and rather than an error, it was an agreement that we needed to choose yes for. So that worked after that, and I finally got the app on my phone. But then, after filling out the login on my phone, the app would crash and restart. I couldn't figure out what exactly was going wrong because there's no error output that I could find so then we needed to figure out how to debug.
One way to debug Kivy on Android is to save whole console output to a text file and read this file in case of application crash or other issues:
import sys
sys.stderr = open('output.txt', 'w')
sys.stdout = sys.stderr

from kivy.logger import LoggerHistory
print('\n'.join([str(l) for l in LoggerHistory.history]))
First part of the code above sets handle to a file as standard error output and standard output, when second logs there current console output of Kivy (the one you normally see on the console/terminal when you start your application). Additionally you can add print statements inside your application to be able to see their output later in this file as well - all output is going to be logged to a file.
To be able to read this file, you need to know domain and name of your application. By default those are accordingly org.test and myapp (changable in buildozer.spec file created by buildozer init command), what gives you full package name of org.test.myapp.
Last required thing is ability to run adb tool (Android Debug Bridge). Buildozer installs it along with other tools during first run, but does not add it to a path. It is accessible via `~/.buildozer/android/platform/android-sdk/platform-tools/adb`.
When you deploy your application to your smart phone and it crash, or you simply want to see an output, do not disconnect your phone. Run terminal and execute below commands to run shell, change directory to your application directory, and list files:
~/.buildozer/android/platform/android-sdk/platform-tools/adb shell
run-as org.test.myapp
cd files/app
ls -l
Remember to replace org.test.myapp with your current package name, if you changed it.
Now you can read output file using: cat output.txt
After doing this, we discovered it was a permissions issue, our app didn't have "internet" permission. Around line 87, make sure the following is uncommented in your buildozer.spec file:
android.permissions = INTERNET
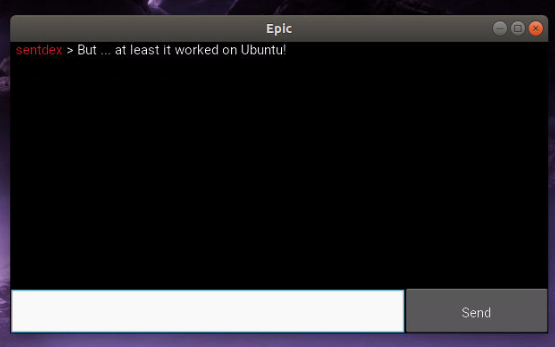
After this, GREAT! it finally worked on mobile! Woohoo!
Having trouble? Tell us about it on discord.gg/sentdex
-
Introduction to Kivy, a multi-platform GUI library for computers (Windows, Linux, Mac) and Mobile (iOS, Android) - Kivy with Python Tutorials
-
Buttons and Events - Kivy with Python Tutorials
-
Changing screens/views/pages with ScreenManager - Kivy with Python Tutorials
-
Scheduling tasks/functions/methods- Kivy with Python Tutorials
-
Chat Application Page - Kivy with Python Tutorials
-
Finishing Chat Application - Kivy with Python Tutorials
-
Packaging and Deployment (PyInstaller, Buildozer) - Kivy with Python Tutorials
