OpenCV with Python Intro and loading Images tutorial
Welcome to a tutorial series, covering OpenCV, which is an image and video processing library with bindings in C++, C, Python, and Java. OpenCV is used for all sorts of image and video analysis, like facial recognition and detection, license plate reading, photo editing, advanced robotic vision, optical character recognition, and a whole lot more.
We will be working through many Python examples here. Getting started with OpenCV's Python bindings is actually much easier than many people make it out to be initially. You will need two main libraries, with an optional third: python-OpenCV, Numpy, and Matplotlib.
Windows Users:
python-OpenCV - There are alternative methods, but this is the easiest. Download the appropriate wheel (.whl) file, and install using pip. See video for help.
pip install numpy
pip install matplotlib
Not familiar with using pip? See the Pip installation tutorial for help.
Linux / Mac Users:
pip3 install numpy or apt-get install python3-numpy. You may need to apt-get install python3-pip.
pip3 install matplotlib or apt-get install python3-matplotlib.
apt-get install python3-OpenCV
Matplotlib is an optional choice for displaying frames from video or images. We will show a couple of examples using it here. Numpy is used for all things "numbers and Python." We are mainly making use of Numpy's array functionality. Finally, we are using the python-specific bindings for OpenCV called python-OpenCV.
There are some operations for OpenCV that you will not be able to do without a full installation of OpenCV (about 3GB in size), but you can actually do quite a bit with the fairly minimal installation of python-OpenCV. We will wind up using the full installation of OpenCV later in this series, so you can feel free to get it if you like, but these 3 modules will keep us busy for a while!
Make sure your installations were successful by running Python, and doing:
import cv2
import matplotlib
import numpy
If you get no errors, then you are ready to go. Ready? Let's dive off the deep-end!
First, we should understand a few basic assumptions and paradigms when it comes to image and video analysis. With the way just about every video camera records today, recordings are actually frames, displayed one after another, 30-60+ times a second. At the core, however, they are static frames, just like images. Thus, image recognition and video analysis use identical methods for the most part. Some things, like directional tracking, is going to require a succession of images (frames), but something like facial detection, or object recognition can be done with almost the exact same code on images and video.
Next, a lot of image and video analysis boils down to simplifying the source as much as possible. This almost always begins with a conversion to grayscale, but it can also be a color filter, gradient, or a combination of these. From here, we can do all sorts of analysis and transformations to the source. Generally, what winds up happening is there is a transformation done, then analysis, then any overlays that we wish to apply are applied back to the original source, which is why you can often see the "finished product" of maybe object or facial recognition being shown on a full-color image or video. Rarely is the data actually processed in raw form like this, however. Some examples of what we can do at a basic level. All of these are done with a basic web cam, nothing special:
Background Subtracting:
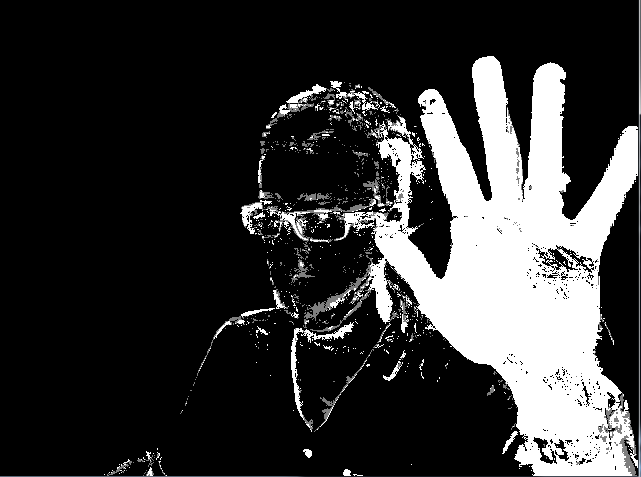
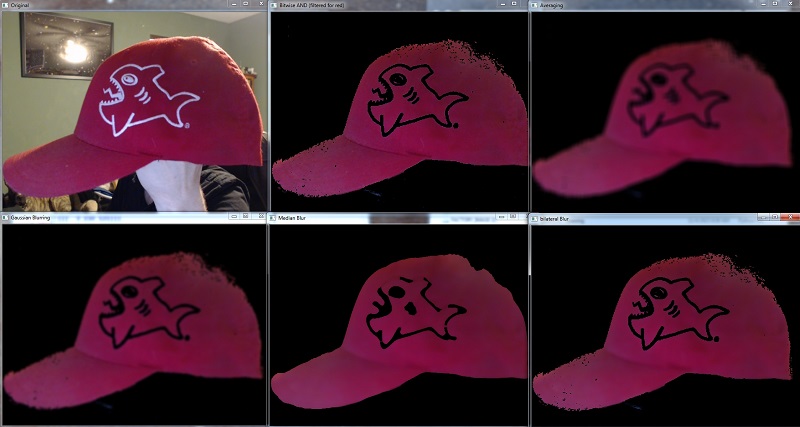
Color filtering:
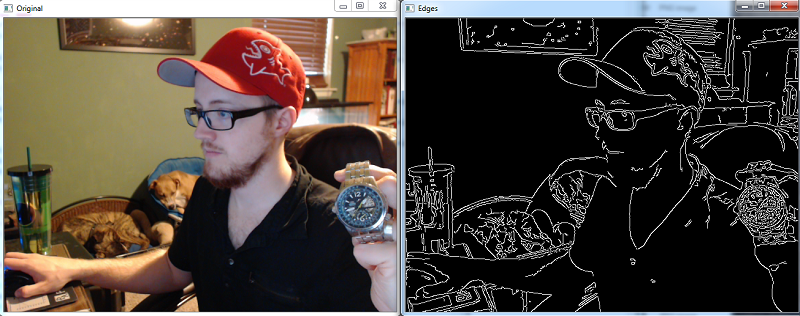
Edge detection:
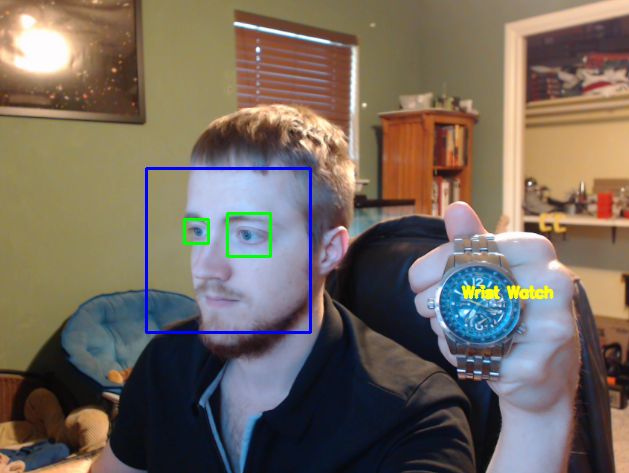
Feature matching for object recognition:
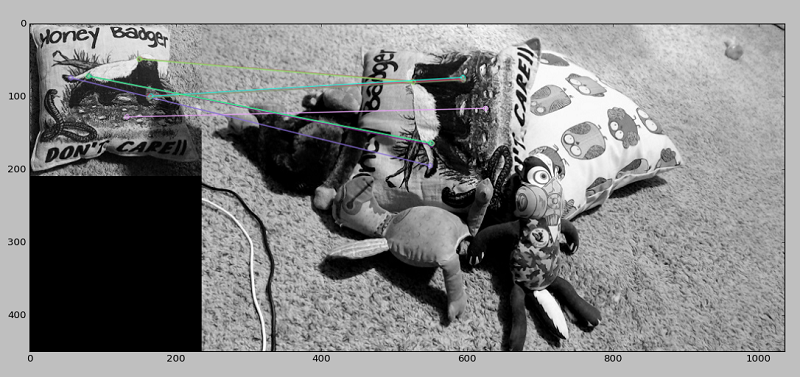
General object recognition:
In the case of edge detection, the black corresponds to pixel values of (0,0,0), and white lines are (255,255,255). Every picture and frame from a video breaks down to pixels like this, and we can deduce, like in the case of edge detection, where edges are based on where the white pixels are compared to black. Then, if we want to see the original image with the edges marked, we note all of the coordinate locations of white pixels, and then we mark these locations on the original source feed image or video.
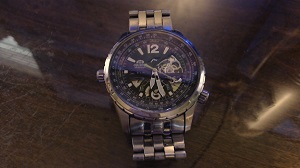
By the end of this tutorial, you will be able to do all of the above, and be able to train your machine to recognize any object you want. Like I said initially though, the first step is usually to convert to gray scale. Before that, we need to load the image. Thus, let's do it! Throughout this entire tutorial, I greatly encourage you to use your own data to play with. If you have a webcam, definitely use it, otherwise find an image that you think will be fun to work with. If you're having trouble, here's an image of a watch:
import cv2
import numpy as np
from matplotlib import pyplot as plt

img = cv2.imread('watch.jpg',cv2.IMREAD_GRAYSCALE)
cv2.imshow('image',img)
cv2.waitKey(0)
cv2.destroyAllWindows()
First, we are importing a few things, those three modules I had you all install. Next, we define img to be cv2.read(image file, parms). The default is going to be IMREAD_COLOR, which is color without any alpha channel. If you're not familiar, alpha is the degree of opaqueness (the opposite of transparency). If you need to retain the alpha channel, you can also use IMREAD_UNCHANGED. Many times, you will be reading in the color version, and later converting it to gray. If you do not have a webcam, this will be the main method you will use throughout this tutorial, loading an image.
Rather than using IMREAD_COLOR...etc, you can also use simple numbers. You should be familiar with both options, so you understand what the person is doing. For the second parameter, you can use -1, 0, or 1. Color is 1, grayscale is 0, and the unchanged is -1. Thus, for grayscale, one could do img = cv2.imread('watch.jpg', 0)
Once loaded, we use cv2.imshow(title,image) to show the image. From here, we use the cv2.waitKey(0) to wait until any key is pressed. Once that's done, we use cv2.destroyAllWindows() to close everything.
As mentioned before, you can also display images with Matplotlib, here's some code for how you might do that:
import cv2
import numpy as np
from matplotlib import pyplot as plt

img = cv2.imread('watch.jpg',cv2.IMREAD_GRAYSCALE)

plt.imshow(img, cmap = 'gray', interpolation = 'bicubic')
plt.xticks([]), plt.yticks([])  # to hide tick values on X and Y axis
plt.plot([200,300,400],[100,200,300],'c', linewidth=5)
plt.show()
Note that you can plot lines, just as you would or could with any other Matplotlib graph using the pixel locations as coordinates, here. Should you wish to draw on your images, however, Matplotlib is not required. OpenCV provides great methods for this. When you are done making modifications, you can save, like so:
cv2.imwrite('watchgray.png',img)
Getting images into OpenCV seems easy enough, how about loading video feeds? In the next tutorial, we're going to show how to load in a webcam or video feed.
-
OpenCV with Python Intro and loading Images tutorial
-
Loading Video Source OpenCV Python Tutorial
-
Drawing and Writing on Image OpenCV Python Tutorial
-
Image Operations OpenCV Python Tutorial
-
Image arithmetics and Logic OpenCV Python Tutorial
-
Thresholding OpenCV Python Tutorial
-
Color Filtering OpenCV Python Tutorial
-
Blurring and Smoothing OpenCV Python Tutorial
-
Morphological Transformations OpenCV Python Tutorial
-
Canny Edge Detection and Gradients OpenCV Python Tutorial
-
Template Matching OpenCV Python Tutorial
-
GrabCut Foreground Extraction OpenCV Python Tutorial
-
Corner Detection OpenCV Python Tutorial
-
Feature Matching (Homography) Brute Force OpenCV Python Tutorial
-
MOG Background Reduction OpenCV Python Tutorial
-
Haar Cascade Object Detection Face & Eye OpenCV Python Tutorial
-
Creating your own Haar Cascade OpenCV Python Tutorial
