Drawing and Writing on Image OpenCV Python Tutorial
In this OpenCV with Python tutorial, we're going to be covering how to draw various shapes on your images and videos. It's fairly common to want to mark detected objects in some way, so we the humans can easily see if our programs are working as we might hope. An example of this would be one of the images shown before:
For this temporary example, I will use the following image:
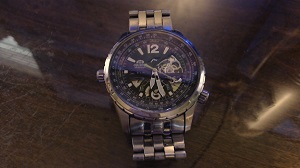
You are encouraged to use your own image. As usual, our starting code can be something like:
import numpy as np
import cv2

img = cv2.imread('watch.jpg',cv2.IMREAD_COLOR)
Next, we can start drawing, like:
cv2.line(img,(0,0),(150,150),(255,255,255),15)

cv2.imshow('image',img)
cv2.waitKey(0)
cv2.destroyAllWindows()
The cv2.line() takes the following parameters: where, start coordinates, end coordinates, color (bgr), line thickness.
The result here:

Alright, cool, let's get absurd with some more shapes. Next up, a rectangle:
cv2.rectangle(img,(15,25),(200,150),(0,0,255),15)
The parameters here are the image, the top left coordinate, bottom right coordinate, color, and line thickness.
How about a circle?
cv2.circle(img,(100,63), 55, (0,255,0), -1)
The parameters here are the image/frame, the center of the circle, the radius, color, and then thickness. Notice we have a -1 for thickness. This means the object will actually be filled in, so we will get a filled in circle.
Lines, rectangles, and circles are cool and all, but what if we want a pentagon, or octagon, or octdecagon?! No problem!
pts = np.array([[10,5],[20,30],[70,20],[50,10]], np.int32)
# OpenCV documentation had this code, which reshapes the array to a 1 x 2. I did not
# find this necessary, but you may:
#pts = pts.reshape((-1,1,2))
cv2.polylines(img, [pts], True, (0,255,255), 3)
First, we name pts, short for points, as a numpy array of coordinates. Then, we use cv2.polylines to draw the lines. The parameters are as follows: where is the object being drawn to, the coordinates, should we "connect" the final and starting dot, the color, and again the thickness.
The final thing you may want to do is write on the image. This can be done like so:
font = cv2.FONT_HERSHEY_SIMPLEX
cv2.putText(img,'OpenCV Tuts!',(0,130), font, 1, (200,255,155), 2, cv2.LINE_AA)
Full code up to this point would be something like:
import numpy as np
import cv2

img = cv2.imread('watch.jpg',cv2.IMREAD_COLOR)
cv2.line(img,(0,0),(200,300),(255,255,255),50)
cv2.rectangle(img,(500,250),(1000,500),(0,0,255),15)
cv2.circle(img,(447,63), 63, (0,255,0), -1)
pts = np.array([[100,50],[200,300],[700,200],[500,100]], np.int32)
pts = pts.reshape((-1,1,2))
cv2.polylines(img, [pts], True, (0,255,255), 3)
font = cv2.FONT_HERSHEY_SIMPLEX
cv2.putText(img,'OpenCV Tuts!',(10,500), font, 6, (200,255,155), 13, cv2.LINE_AA)
cv2.imshow('image',img)
cv2.waitKey(0)
cv2.destroyAllWindows()
The result:

In the next tutorial, we're going to cover basic image operations that we can perform.
-
OpenCV with Python Intro and loading Images tutorial
-
Loading Video Source OpenCV Python Tutorial
-
Drawing and Writing on Image OpenCV Python Tutorial
-
Image Operations OpenCV Python Tutorial
-
Image arithmetics and Logic OpenCV Python Tutorial
-
Thresholding OpenCV Python Tutorial
-
Color Filtering OpenCV Python Tutorial
-
Blurring and Smoothing OpenCV Python Tutorial
-
Morphological Transformations OpenCV Python Tutorial
-
Canny Edge Detection and Gradients OpenCV Python Tutorial
-
Template Matching OpenCV Python Tutorial
-
GrabCut Foreground Extraction OpenCV Python Tutorial
-
Corner Detection OpenCV Python Tutorial
-
Feature Matching (Homography) Brute Force OpenCV Python Tutorial
-
MOG Background Reduction OpenCV Python Tutorial
-
Haar Cascade Object Detection Face & Eye OpenCV Python Tutorial
-
Creating your own Haar Cascade OpenCV Python Tutorial
