Image Operations OpenCV Python Tutorial
In this Python with OpenCV tutorial, we're going to cover some of the basics of simple image operations that we can do. Every video breaks down into frames. Each frame, like an image, then breaks down into pixels stored in rows and columns within the frame/picture. Each pixel has a coordinate location, and each pixel is comprised of color values. Let's work out some examples of accessing various bits of these principles.
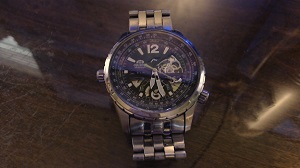
We will start by reading in the image as usual (use your own if you can, but here's the one I am using here):
watch.jpg
import cv2
import numpy as np

img = cv2.imread('watch.jpg',cv2.IMREAD_COLOR)
Now, we can reference specific pixels, like so:
px = img[55,55]
Next, we could actually change a pixel:
img[55,55] = [255,255,255]
Then re-reference:
px = img[55,55]
print(px)
It should be different now. Next, we can reference an ROI, or Region of Image, like so:
px = img[100:150,100:150]
print(px)
We can also modify the ROI, like this:
img[100:150,100:150] = [255,255,255]
We can reference certain characteristics of our image:
print(img.shape)
print(img.size)
print(img.dtype)
And we can perform operations, like:
watch_face = img[37:111,107:194]
img[0:74,0:87] = watch_face

cv2.imshow('image',img)
cv2.waitKey(0)
cv2.destroyAllWindows()
This will work with my image, but may not for your image, depending on the size. The output in my case:

These were some simple operations. In the next tutorial, we're going to cover some more advanced image operations that we can perform.
-
OpenCV with Python Intro and loading Images tutorial
-
Loading Video Source OpenCV Python Tutorial
-
Drawing and Writing on Image OpenCV Python Tutorial
-
Image Operations OpenCV Python Tutorial
-
Image arithmetics and Logic OpenCV Python Tutorial
-
Thresholding OpenCV Python Tutorial
-
Color Filtering OpenCV Python Tutorial
-
Blurring and Smoothing OpenCV Python Tutorial
-
Morphological Transformations OpenCV Python Tutorial
-
Canny Edge Detection and Gradients OpenCV Python Tutorial
-
Template Matching OpenCV Python Tutorial
-
GrabCut Foreground Extraction OpenCV Python Tutorial
-
Corner Detection OpenCV Python Tutorial
-
Feature Matching (Homography) Brute Force OpenCV Python Tutorial
-
MOG Background Reduction OpenCV Python Tutorial
-
Haar Cascade Object Detection Face & Eye OpenCV Python Tutorial
-
Creating your own Haar Cascade OpenCV Python Tutorial
