Image arithmetics and Logic OpenCV Python Tutorial
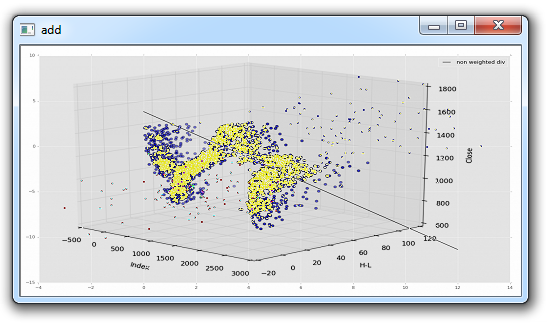
Welcome to another OpenCV with Python tutorial, in this tutorial we are going to be covering some simple arithmetic operations that we can perform on images, along with explaining what they do. To do this, we will require two images of equal size to start, then later on a smaller image and a larger one. To start, I will use:

and

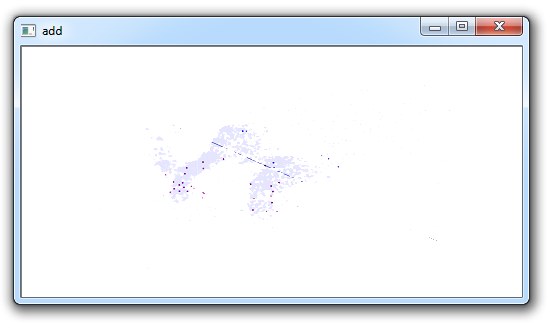
First, let's see what a simple addition will do:
import cv2
import numpy as np

# 500 x 250
img1 = cv2.imread('3D-Matplotlib.png')
img2 = cv2.imread('mainsvmimage.png')

add = img1+img2

cv2.imshow('add',add)
cv2.waitKey(0)
cv2.destroyAllWindows()
Result:
It is unlikely you will want this sort of messy addition. OpenCV has an "add" method, let's see what that does, replacing the previous "add" with:
add = cv2.add(img1,img2)
Result:
Probably not the ideal here either. We can see that much of the image is very "white." This is because colors are 0-255, where 255 is "full light." Thus, for example: (155,211,79) + (50, 170, 200) = 205, 381, 279...translated to (205, 255,255).
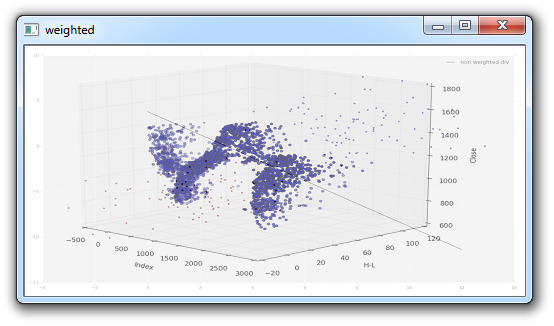
Next, we can add images, and have each carry a different "weight" so to speak. Here's how that might work:
import cv2
import numpy as np

img1 = cv2.imread('3D-Matplotlib.png')
img2 = cv2.imread('mainsvmimage.png')

weighted = cv2.addWeighted(img1, 0.6, img2, 0.4, 0)
cv2.imshow('weighted',weighted)
cv2.waitKey(0)
cv2.destroyAllWindows()
For the addWeighted method, the parameters are the first image, the weight, the second image, that weight, and then finally gamma, which is a measurement of light. We'll leave that at zero for now.
Result:
Those are some addition options, but what if you quite literally want to add one image to another, where the newest overlaps the first? In this case, you would start with the largest, then add the smaller image(s). For this, we will use that same 3D-Matplotlib.png image, but use a new one, a Python logo:

Now, we can take this logo, and place it on the original image. That would be pretty easy (basically using the same-ish code we used in the previous tutorial where we replaced the Region of Image (ROI) with a new one), but what if we just want the logo part, and not the white background? We can use the same principle as we had used before for the ROI replacement, but we need a way to "remove" the background of the logo, so that the white is not needlessly blocking more of the background image. First I will show the full code, and then explain:
import cv2
import numpy as np

# Load two images
img1 = cv2.imread('3D-Matplotlib.png')
img2 = cv2.imread('mainlogo.png')

# I want to put logo on top-left corner, So I create a ROI
rows,cols,channels = img2.shape
roi = img1[0:rows, 0:cols ]

# Now create a mask of logo and create its inverse mask
img2gray = cv2.cvtColor(img2,cv2.COLOR_BGR2GRAY)

# add a threshold
ret, mask = cv2.threshold(img2gray, 220, 255, cv2.THRESH_BINARY_INV)

mask_inv = cv2.bitwise_not(mask)

# Now black-out the area of logo in ROI
img1_bg = cv2.bitwise_and(roi,roi,mask = mask_inv)

# Take only region of logo from logo image.
img2_fg = cv2.bitwise_and(img2,img2,mask = mask)

dst = cv2.add(img1_bg,img2_fg)
img1[0:rows, 0:cols ] = dst

cv2.imshow('res',img1)
cv2.waitKey(0)
cv2.destroyAllWindows()
A decent amount happened here, and a few new things showed up. The first thing we see that is new, is the application of a threshold: ret, mask = cv2.threshold(img2gray, 220, 255, cv2.THRESH_BINARY_INV).
We will be covering thresholding more in the next tutorial, so stay tuned for the specifics, but basically the way it works is it will convert all pixels to either black or white, based on a threshold value. In our case, the threshold is 220, but we can use other values, or even dynamically choose one, which is what the ret variable can be used for. Next, we see: mask_inv = cv2.bitwise_not(mask). This is a bitwise operation. Basically, these operators are very similar to the typical ones from python, except for one, but we wont be touching it anyway here. In this case, the invisible part is where the black is. Then, we can say that we want to black out this area in the first image, and then take image 2 and replace it's contents in that empty spot.
Result:

In the next tutorial, we discuss thresholding more in depth.
-
OpenCV with Python Intro and loading Images tutorial
-
Loading Video Source OpenCV Python Tutorial
-
Drawing and Writing on Image OpenCV Python Tutorial
-
Image Operations OpenCV Python Tutorial
-
Image arithmetics and Logic OpenCV Python Tutorial
-
Thresholding OpenCV Python Tutorial
-
Color Filtering OpenCV Python Tutorial
-
Blurring and Smoothing OpenCV Python Tutorial
-
Morphological Transformations OpenCV Python Tutorial
-
Canny Edge Detection and Gradients OpenCV Python Tutorial
-
Template Matching OpenCV Python Tutorial
-
GrabCut Foreground Extraction OpenCV Python Tutorial
-
Corner Detection OpenCV Python Tutorial
-
Feature Matching (Homography) Brute Force OpenCV Python Tutorial
-
MOG Background Reduction OpenCV Python Tutorial
-
Haar Cascade Object Detection Face & Eye OpenCV Python Tutorial
-
Creating your own Haar Cascade OpenCV Python Tutorial
