Testing Custom Object Detector - Tensorflow Object Detection API Tutorial
Welcome to part 6 of the TensorFlow Object Detection API tutorial series. In this part of the tutorial, we are going to test our model and see if it does what we had hoped. In order to do this, we need to export the inference graph.
Luckily for us, in the models/object_detection directory, there is a script that does this for us: export_inference_graph.py
To run this, you just need to pass in your checkpoint and your pipeline config, then wherever you want the inference graph to be placed. For example:
python3 export_inference_graph.py \
    --input_type image_tensor \
    --pipeline_config_path training/ssd_mobilenet_v1_pets.config \
    --trained_checkpoint_prefix training/model.ckpt-10856 \
    --output_directory mac_n_cheese_inference_graph
Your checkpoint files should be in the training directory. Just look for the one with the largest step (the largest number after the dash), and that's the one you want to use. Next, make sure the pipeline_config_path is set to whatever config file you chose, and then finally choose the name for the output directory, I went with mac_n_cheese_inference_graph
Run the above command from models/object_detection
If you get an error about no module named 'nets', then you need to re run:
# From tensorflow/models/
export PYTHONPATH=$PYTHONPATH:`pwd`:`pwd`/slim
# switch back to object_detection after this and re run the above command
Otherwise, you should have a new directory, in my case, mine is mac_n_cheese_inference_graph, inside it, I have new checkpoint data, a saved_model directory, and, most importantly, the forzen_inference_graph.pb file.
Now, we're just going to use the sample notebook, edit it, and see how our model does on some testing images. I copied some of my models/object_detection/images/test images into the models/object_detection/test_images directory, and renamed them to be image3.jpg, image4.jpg...etc.
Booting up jupyter notebook and opening the object_detection_tutorial.ipynb, let's make a few changes. First, head to the Variables section, and let's change the model name, and the paths to the checkpoint and the labels:
# What model to download.
MODEL_NAME = 'mac_n_cheese_inference_graph'

# Path to frozen detection graph. This is the actual model that is used for the object detection.
PATH_TO_CKPT = MODEL_NAME + '/frozen_inference_graph.pb'

# List of the strings that is used to add correct label for each box.
PATH_TO_LABELS = os.path.join('training', 'object-detection.pbtxt')

NUM_CLASSES = 1
Next, we can just delete the entire Download Model section, since we don't need to download anymore.
Finally, in the Detection section, change the TEST_IMAGE_PATHS var to:
TEST_IMAGE_PATHS = [ os.path.join(PATH_TO_TEST_IMAGES_DIR, 'image{}.jpg'.format(i)) for i in range(3, 8) ]
With that, you can go to the Cell menu option, and then "Run All."
Here are a few of my results:
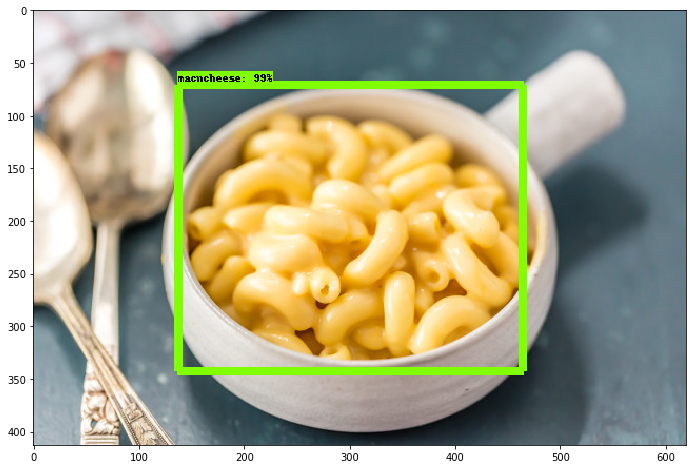
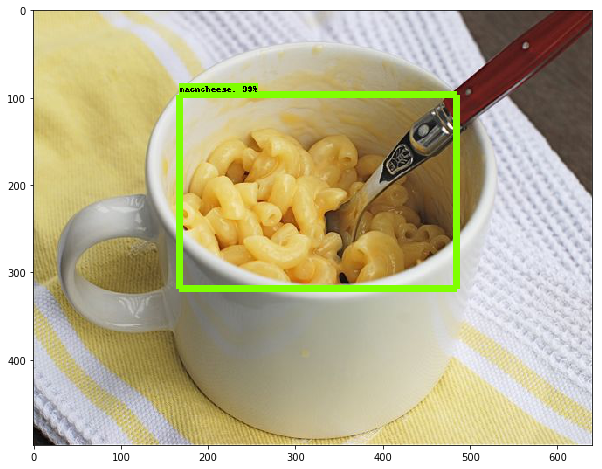
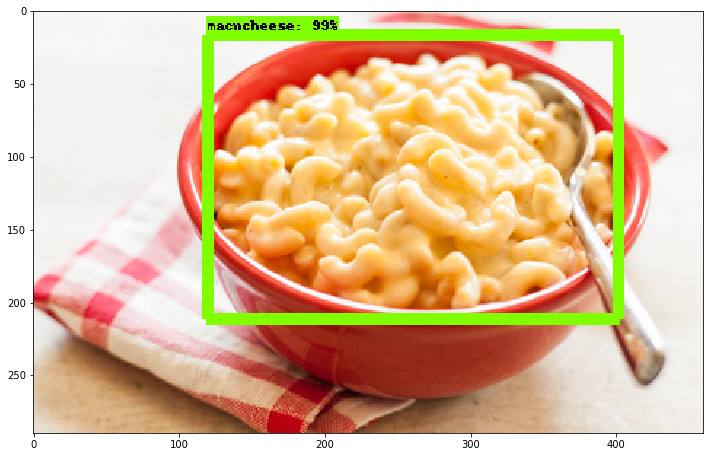
Overall, I am extremely pleased at how well this all works, and, even when you have a very small dataset, you can still have success, and only need to train a model for about an hour (on a decent GPU anyway) using transfer learning. Very cool!
-
Introduction and Use - Tensorflow Object Detection API Tutorial
-
Streaming Object Detection Video - Tensorflow Object Detection API Tutorial
-
Tracking Custom Objects Intro - Tensorflow Object Detection API Tutorial
-
Creating TFRecords - Tensorflow Object Detection API Tutorial
-
Training Custom Object Detector - Tensorflow Object Detection API Tutorial
-
Testing Custom Object Detector - Tensorflow Object Detection API Tutorial
