Tracking Custom Objects Intro - Tensorflow Object Detection API Tutorial
Welcome to part 3 of the TensorFlow Object Detection API tutorial series. In this part and the subsequent few, we're going to cover how we can track and detect our own custom objects with this API. If you watch the video, I am making use of Paperspace. If you need a high-end GPU, you can use their cloud-desktop solution with that referral link for a $10 credit, which is more than enough to finish this miniseries (train time is ~1 hour on their $0.40/hr GPU)
Going from using the pre-built models to adding custom objects is a decent jump from my findings, and I could not locate any full step-by-step guides, so hopefully I can save you all from the struggle. Once solved, the ability to train for any custom object you can think of (and create data for) is an awesome skill to have.
Alright, so a brief overview of the steps needed to do this:
- Collect a few hundred images that contain your object - The bare minimum would be about 100, ideally more like 500+, but, the more images you have, the more tedious step 2 is...
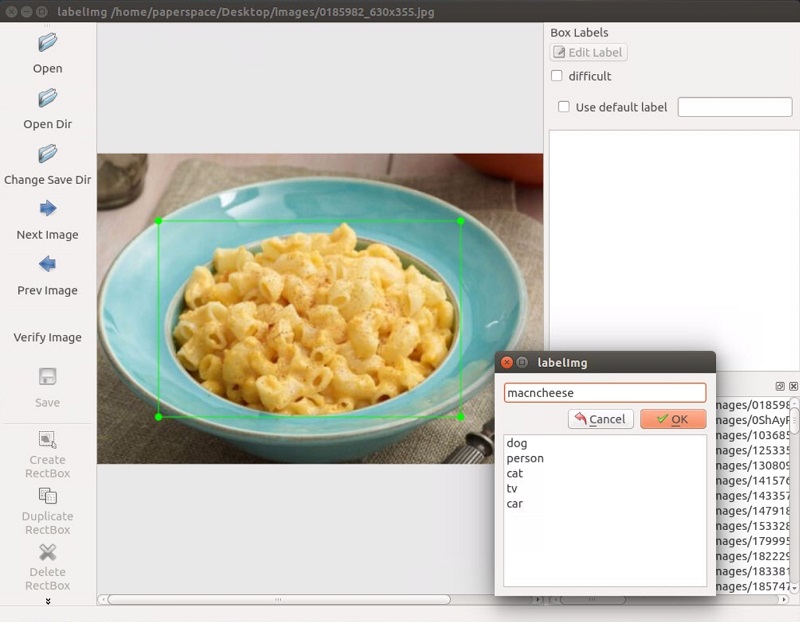
- Annotate/label the images, ideally with a program. I personally used LabelImg. This process is basically drawing boxes around your object(s) in an image. The label program automatically will create an XML file that describes the object(s) in the pictures.
- Split this data into train/test samples
- Generate TF Records from these splits
- Setup a .config file for the model of choice (you could train your own from scratch, but we'll be using transfer learning)
- Train
- Export graph from new trained model
- Detect custom objects in real time!
- ...
- Profit!
So, for this tutorial, I needed an object. I wanted something useful, but that wasn't already done. Obviously, everyone needs to know where the macaroni and cheese is, so let's track that!
I used Google Images, Bing, and ImageNet to collect some images of Mac n Cheese. In general, pictures around the size of 800x600, not too large and not too small.
For this tutorial, you can track *anything* you want, you just need 100+ images. Once you have images, you need to annotate them. For this, I am going to use LabelImg, you can grab it with git clone https://github.com/tzutalin/labelImg, or just download and extract the zip.
Installation instructions are on the labelimg github, but for Python3 on Ubuntu:
sudo apt-get install pyqt5-dev-tools
sudo pip3 install lxml
make qt5py3
python3 labelImg.py
When running this, you should get a GUI window. From here, choose to open dir and pick the directory that you saved all of your images to. Now, you can begin to annotate with the create rectbox button. Draw your box, add the name in, and hit ok. Save, hit next image, and repeat! You can press the w key to draw the box and do ctrl+s to save faster. Not sure if there's a shortcut for the next image.
Once you have over 100 images labeled, we're going to separate them into training and testing groups. To do this, just copy about 10% of your images and their annotation XML files to a new dir called test and then copy the remaining ones to a new dir called train
Once you've done all of this, you're ready to go to the next tutorial, where we're going to cover how we can create the required TFRecord files from this data.
Alternatively, if you would like to just use my pre-made files, you can download my labeled macaroni and cheese.
-
Introduction and Use - Tensorflow Object Detection API Tutorial
-
Streaming Object Detection Video - Tensorflow Object Detection API Tutorial
-
Tracking Custom Objects Intro - Tensorflow Object Detection API Tutorial
-
Creating TFRecords - Tensorflow Object Detection API Tutorial
-
Training Custom Object Detector - Tensorflow Object Detection API Tutorial
-
Testing Custom Object Detector - Tensorflow Object Detection API Tutorial
