Quadcopter Assembly Tutorial
Welcome to part 3 of our building a quadcopter series. In this tutorial, we'll cover the building process.
This step, just like all of the parts you might buy, is highly variable. At the most basic level, the connections are all the same. For exactly how you put together your frame, see the instructions with it. For exact placement for your other parts, that's all up to you for the most part. Your flight control board needs to be at the center point for balance purposes.
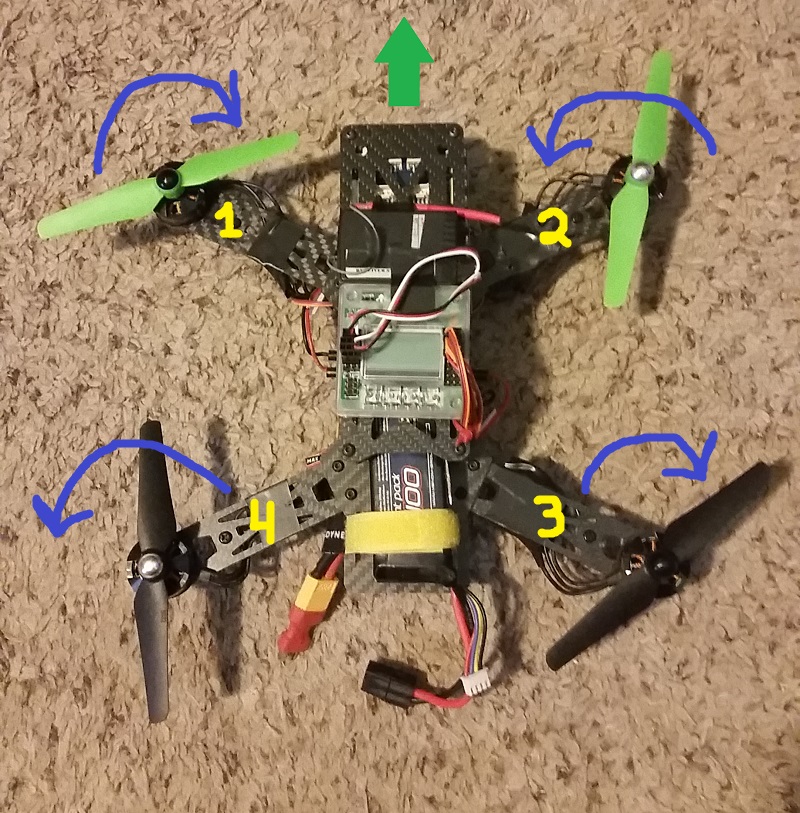
Some motors are universal, others are specifically threaded. If your motor is "self tightening," then this means it is meant to spin in only one direction in order to keep the propellers on. Pictured below contains the intended motor rotation, along with motor numbers. Generally, if you have threaded motor shafts, then motors 1 and 3 will have black tips and 2 and 4 will be silver.
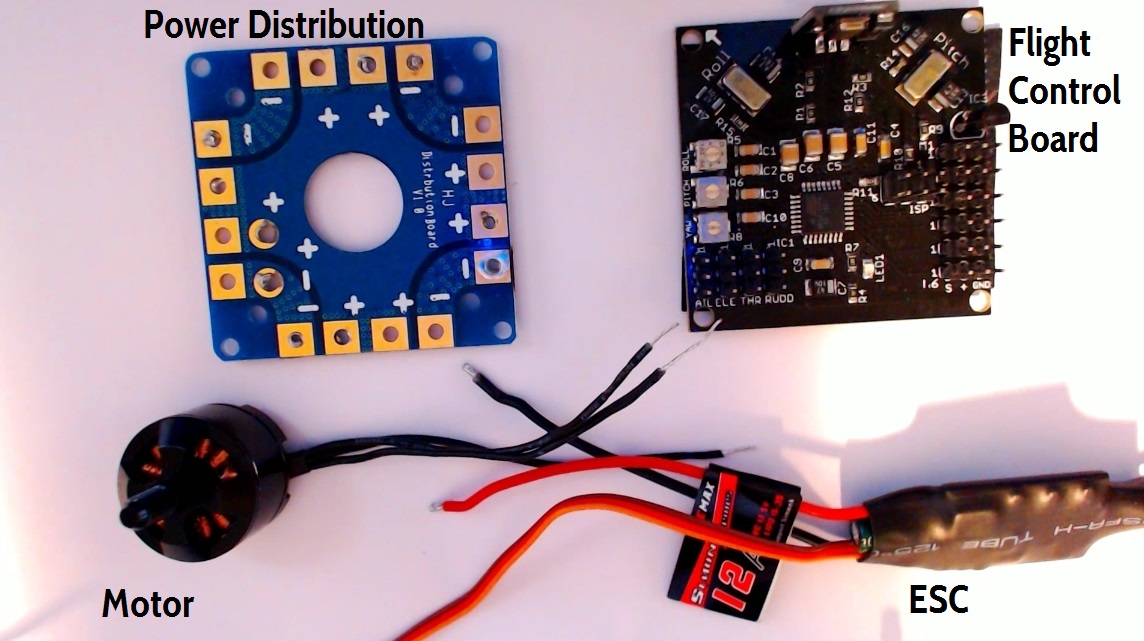
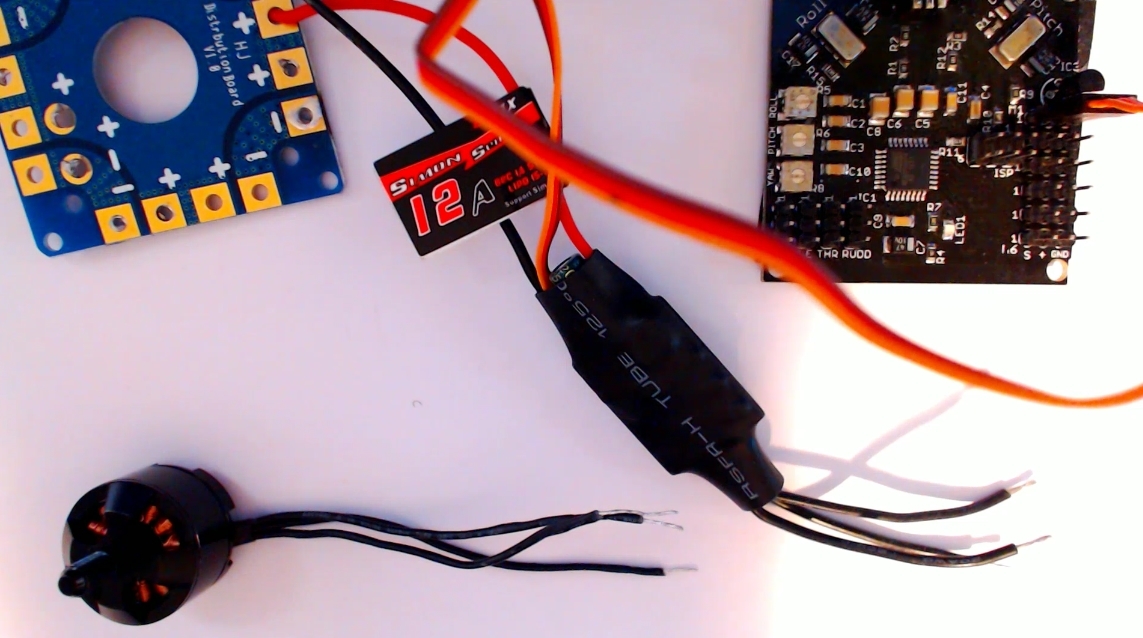
Beyond that, the next requirement is how the main compents are all wired together. The major parts are: the power distribution board, the ESC (electronic speed controllers), the motors, and the flight control board:
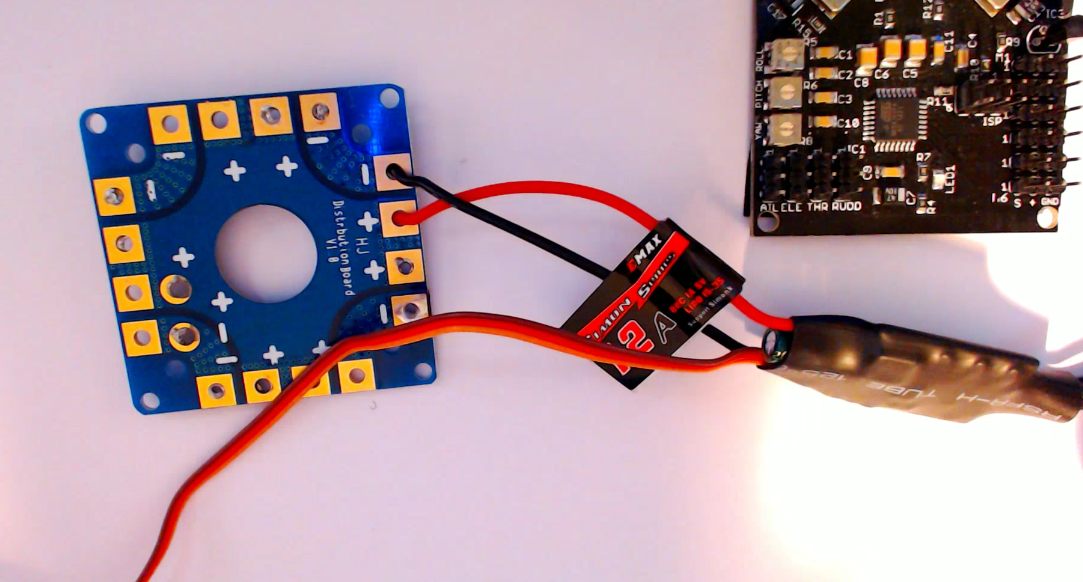
The ESCs have their positive and negative leads connected to the power distribution board :
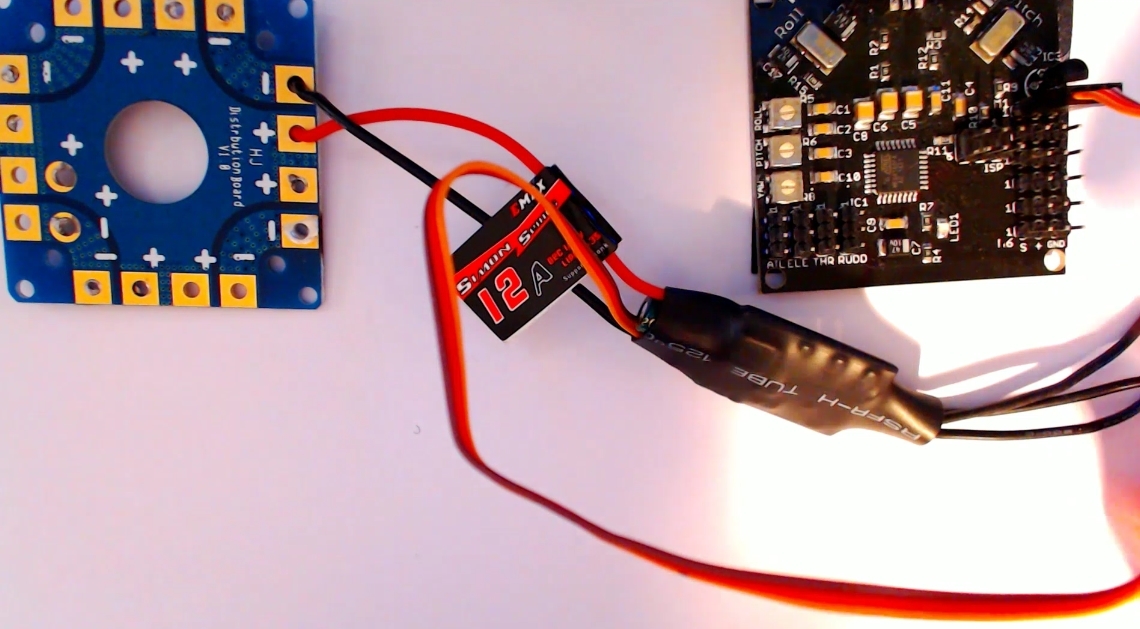
The ESCs have a signal wire that is plugged into the control board (ground to the edge):
Finally, the 3 black wires are connected to the 3 black wires on the motor:
Connecting randomly can seem odd, but that's just how it is. Here, you are going to solder the bullet connections. You want to be able to swap the connections around. The reason for this is because, if the motor is not spinning in the correct direction, you need to switch two wires. Just like connecting is random, if you want to reverse the motor direction, all you need to do is swap any two wires. How that works, I do not know, but that's how it is!
Next, you will need to connect the receiver for your transmitter to the flight control board. This may vary a bit depending on the board and receiver, but both of the receiver and flight control board should be labeled as to what plugs in where.
Beyond this, check out the video for more information and to see me putting mine together at a fast pace. Feel free to ask questions on the video if you have them!
