Kivy Widgets and Labels
In this Kivy tutorial, we're going to be discussing the notion of "labels" and "widgets." The idea of widgets is to have a handful of various types of elements, and then we can put them together for an application. Think of a home page with a login. You might have a home page that has some text that says something like "username" and "password." Then you will also need some text fields for input. To do this with Kivy, we'll use Label to have the text, then we're going to use a text input widget for letting the user actually type something.
Let's hop in!
KivyVideo2.py file:
from kivy.app import App
#kivy.require("1.8.0")
from kivy.uix.label import Label
from kivy.uix.gridlayout import GridLayout
from kivy.uix.textinput import TextInput
Importing App as usual, and Label like before. Then we are importing the GridLayout, which is one of many types of layouts. Finally, we're grabbing the TextInput part of Kivy.
class LoginScreen(GridLayout):
    def __init__(self, **kwargs):
        super(LoginScreen, self).__init__(**kwargs)
        self.cols = 2
LoginScreen class, which will inherit from GridLayout. We use super to avoid needing to refer to the base class, as well as utilize multi-inheritance.
If you're confused about OOP, check out the Object Oriented Programming Crash Course.
        self.add_widget(Label(text="Username:"))
        self.username = TextInput(multiline=False)
        self.add_widget(self.username)
Adding a Label widget with the text of username. Then we add a text input to save as a username, then we add that widget.
        self.add_widget(Label(text="Password:"))
        self.password = TextInput(multiline=False, password=True)
        self.add_widget(self.password)

        self.add_widget(Label(text="Two Factor Auth:"))
        self.tfa = TextInput(multiline=False)
        self.add_widget(self.tfa)
After seeing how to add the username Label and the username text input field, we then can use an identical structure to create a Password Label, then text-input. Then we do it one more time for another field, this time for two-factor-authentication as an example.
Notice we also have another parameter in the password widget, which is this "password = True." Upon running, you will see that this parameter will convert the text input to asterisks, to mask the password to nosey-onlookers.
class SimpleKivy(App):
    def build(self):
        return LoginScreen()

if __name__ == "__main__":
    SimpleKivy().run()
Now we just finish up the script with some familiar code, mainly changing the return of the SimpleKivy.build to be return LoginScreen (the class we just wrote)
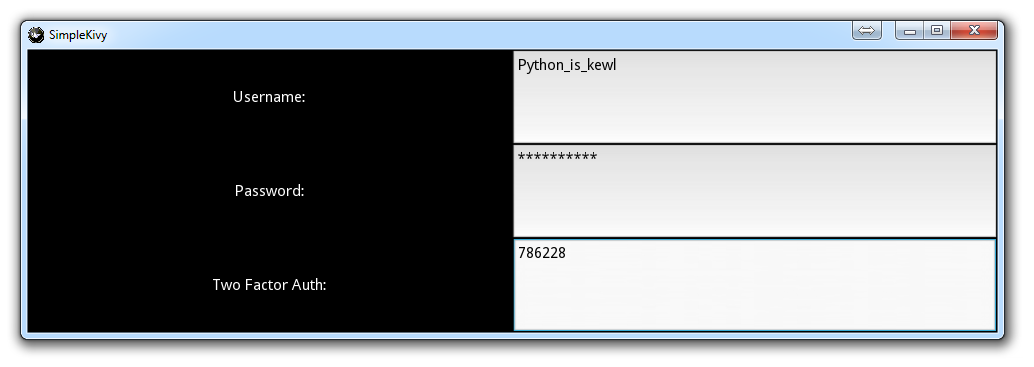
That's it! Now you can run it, and you should see something like:
So far, we've coded everything in Python. You can actually code all of your Kivy application within Python, but you might be missing out by not using the Kivy language (.kv files).
There exists 1 quiz/question(s) for this tutorial. for access to these, video downloads, and no ads.
-
Kivy with Python tutorial for Mobile Application Development Part 1
-
Kivy Widgets and Labels
-
The Kivy .kv Language
-
Kivy .kv Language cont'd
-
Dynamic Resizable Placement
-
Layouts: Float Layout
-
Getting Mouse / Press / Touch Input
-
Simple Drawing Application
-
Builder for loading .kv Files
-
Screen Manager for Multiple Screens
-
Drawing Application with Screen Manager
-
Adding better Navigation
