Layouts: Float Layout
In this Kivy basics tutorial, we're going to be talking about another type of layout: the Float Layout.
from kivy.app import App
#kivy.require("1.8.0")
from kivy.uix.floatlayout import FloatLayout

class SimpleKivy4(App):
    def build(self):
        return FloatLayout()

if __name__ == "__main__":
    SimpleKivy4().run()
This code should look mostly familiar.
The only major changes here are that we're importing the FloatLayout, and we're having SimpleKivy4 (our main class here) returning FloatLayout.
Now for our SimpleKivy4.kv file:
<Button>:
    font_size: 40
	color: 0,1,0,1
	size_hint: 0.3, 0.2

<FloatLayout>:
    Button:
	    text: "Kivy"
		pos_hint: {"x": 0, 'y':0}

	Button:
	    text: "Tutorials"
		pos_hint: {"right": 0.5, 'top':1}
Now, we see a few new terms within our .kv file.
First, we see this size_hint variable. Size_hint is a hint at the size of an element, based on portions of the "total" available. 0.3, 0.2 means the element will be 30% of the window wide, and 20% of the window tall.
Next, we spot pos_hint. Pos_hint gives a hint at the position, which is measured relatively between 0 and 1, where 1 is "completely" something and 0 is "not" something.
Pos_hint was just confusing to me for a while, and I still have to think a bit about what it actually means... but I just add "ness" to the term I am modifying. So, if we say pos_hint is {"right":0.5 and "top":1}, then we're saying it has "half right-ness" and full "top-ness."
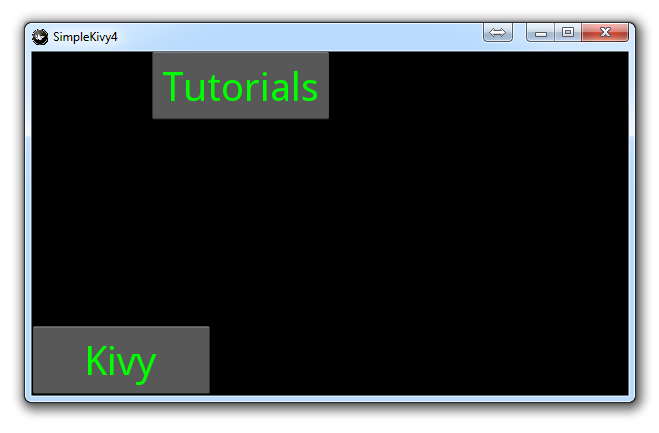
Using these terms, with float layout, gives you the ability now to have a window with widgets, buttons, labels, and whatever else that will resize pretty well, no matter what the size of the window is, or the orientation of the window (portrait vs landscape).
Now, our application can do:

Or...

As you can see, we're able to adjust the pixel position, as well as the size, completely relatively according to the size and shape of the actual window itself. Pretty cool!
-
Kivy with Python tutorial for Mobile Application Development Part 1
-
Kivy Widgets and Labels
-
The Kivy .kv Language
-
Kivy .kv Language cont'd
-
Dynamic Resizable Placement
-
Layouts: Float Layout
-
Getting Mouse / Press / Touch Input
-
Simple Drawing Application
-
Builder for loading .kv Files
-
Screen Manager for Multiple Screens
-
Drawing Application with Screen Manager
-
Adding better Navigation
