Drawing objects with PyGame
For simple things, we might find that we just want to use the built in functionality with PyGame to draw various shapes to the surface. Drawing in PyGame is built in, so that's easy enough. We can draw circles, squares, rectangles, or custom polygons of our choice with coordinates.
Here's our new code:
import pygame
import time
import random
pygame.init()
display_width = 800
display_height = 600
black = (0,0,0)
white = (255,255,255)
red = (255,0,0)
car_width = 73
gameDisplay = pygame.display.set_mode((display_width,display_height))
pygame.display.set_caption('A bit Racey')
clock = pygame.time.Clock()
carImg = pygame.image.load('racecar.png')
#######
def things(thingx, thingy, thingw, thingh, color):
pygame.draw.rect(gameDisplay, color, [thingx, thingy, thingw, thingh])
#######
def car(x,y):
gameDisplay.blit(carImg,(x,y))
def text_objects(text, font):
textSurface = font.render(text, True, black)
return textSurface, textSurface.get_rect()
def message_display(text):
largeText = pygame.font.Font('freesansbold.ttf',115)
TextSurf, TextRect = text_objects(text, largeText)
TextRect.center = ((display_width/2),(display_height/2))
gameDisplay.blit(TextSurf, TextRect)
pygame.display.update()
time.sleep(2)
game_loop()
def crash():
message_display('You Crashed')
def game_loop():
x = (display_width * 0.45)
y = (display_height * 0.8)
x_change = 0
######
thing_startx = random.randrange(0, display_width)
thing_starty = -600
thing_speed = 7
thing_width = 100
thing_height = 100
######
gameExit = False
while not gameExit:
for event in pygame.event.get():
if event.type == pygame.QUIT:
pygame.quit()
quit()
if event.type == pygame.KEYDOWN:
if event.key == pygame.K_LEFT:
x_change = -5
if event.key == pygame.K_RIGHT:
x_change = 5
if event.type == pygame.KEYUP:
if event.key == pygame.K_LEFT or event.key == pygame.K_RIGHT:
x_change = 0
x += x_change
gameDisplay.fill(white)
##########
# things(thingx, thingy, thingw, thingh, color)
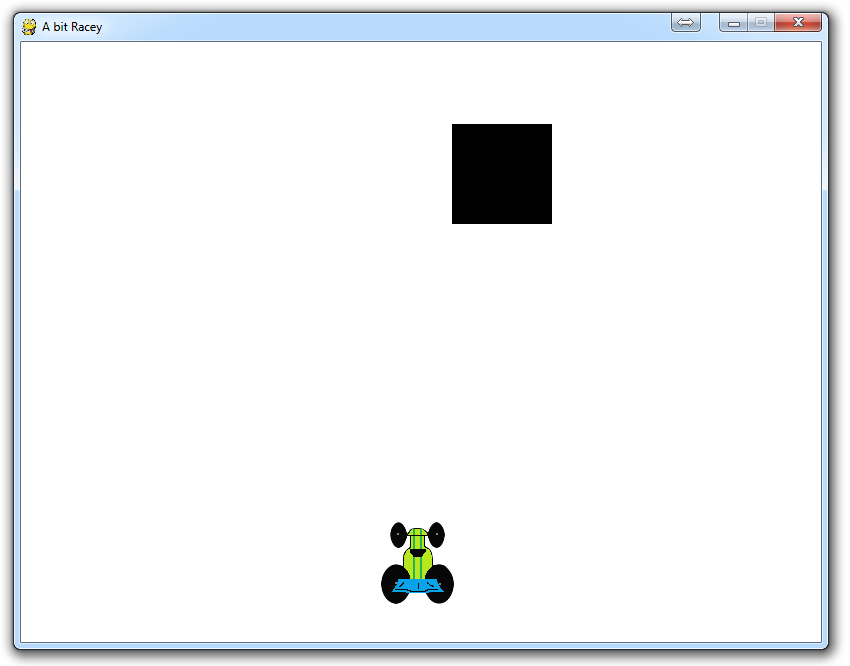
things(thing_startx, thing_starty, thing_width, thing_height, black)
thing_starty += thing_speed
car(x,y)
##########
if x > display_width - car_width or x < 0:
crash()
if thing_starty > display_height:
thing_starty = 0 - thing_height
thing_startx = random.randrange(0,display_width)
pygame.display.update()
clock.tick(60)
game_loop()
pygame.quit()
quit()
So, the first new thing we see is:
def things(thingx, thingy, thingw, thingh, color):
    pygame.draw.rect(gameDisplay, color, [thingx, thingy, thingw, thingh])
This function takes x, y starting points, width and height variables, and finally a color.
From there, we use pygame.draw.rect() to draw the polygon to our specifications. The parameters to this function are : where, what color, and then the x,y location followed by the width and the height.
Then, in our game_loop we see:
    thing_startx = random.randrange(0,display_width)
    thing_starty = -600
    thing_speed = 7

    thing_width = 100
    thing_height = 100
We want the starting position of the object to be random in it's x range, between 0 and the width of our display. Remember that X is left to right, so basically this allows us to have the block start at a random position between the edges of the screen.
Then, we define the starting y position with thing_starty. We specify this as -600. We do this so the player has a moment to get situated before the block appears on the screen to be avoided.
Then we specify the object's speed. This is how many pixels at a time will it move. Right now, per frame, this block will move 7 pixels. We can increase or decrease this number to directly affect difficulty.
Finally, we define the blocks width and height.
All of these vars are "initial" variables. As the game runs, we will change these values accordingly. So, within the main logic of our script, we see the addition of:
        things(thing_startx, thing_starty, thing_width, thing_height, black)
        thing_starty += thing_speed
What happens here is we re-call the function to run with the starting variables, and we also add the "thing_speed" (which is 7 pixels that it moves each time) to the y position, thing_starty, of the block. So, at 60 FPS, we move the block down 7 pixels each frame.
If we just stopped here, we'd find that only 1 block is generated, and, once it has passed us, it will just keep going forever. We need some handling, like the handling we used with our car, to create another block once one has moved off of the screen.
That is where:
        if thing_starty > display_height:
            thing_starty = 0 - thing_height
            thing_startx = random.randrange(0,display_width)
comes in handy! So, we're just asking if the thing's y location is greater than (remember in computers than x,y = 0,0 means top left!) the display_height, so it has moved all the way down off the screen. If this is the case, then we want to create another block. First we re-assign a y value to the block, where we use 0-thing_height. Why is this? We do this so the block reappears "off" the screen, to give the illusion that we have just come upon it, rather than it was spawned... even though it was. If it just popped up on the screen, it would look silly. This is THEATER people!
Finally, we re-define the x position of the block, again, using a range between 0 and the entire width of the display. A superior choice here would be instead to do a range between 0 and display_width - object width. This way the block wont appear in part off-screen. That's okay though, the show must go on!
There exists 2 quiz/question(s) for this tutorial. for access to these, video downloads, and no ads.
-
Introduction to PyGame
-
Displaying images with PyGame
-
Moving an image around in PyGame
-
Adding boundaries
-
Displaying text to PyGame screen
-
Drawing objects with PyGame
-
Crashing
-
PyGame Score
-
Drawing Objects and Shapes in PyGame
-
Creating a start menu
-
PyGame Buttons, part 1, drawing the rectangle
-
PyGame Buttons, part 2, making the buttons interactive
-
PyGame Buttons, part 3, adding text to the button
-
PyGame Buttons, part 4, creating a general PyGame button function
-
PyGame Buttons, part 5, running functions on a button click
-
Converting PyGame to an executable
-
Adding a pause function to our game and Game Over
-
PyGame Icon
-
Sounds and Music with PyGame
