Basics, init.py, and your first Flask App!
Now that you've got your server and domain set up, it is time to set up Flask and get your very first web application up! There are many commands that we will need to run, but, have no fear, I will put all of the commands and code blocks here!
First, you'll need to run:sudo apt-get install apache2 mysql-client mysql-serverOnce you do that, you'll get the start up page for MySQL, where you will need to set your root user for MySQL. This is the specific MySQL root user, not your server root user.
That setup should take about 20-30 seconds. After that, we need to get WSGI, so run the following:
sudo apt-get install libapache2-mod-wsgi
Once we have that, we need to make sure we've enabled WSGI with the following:
sudo a2enmod wsgi
It is probably already enabled from the installation, but it is a good idea to make sure.
Next we are ready to set up our Flask environment.
Run:
cd /var/www/
Now let's make our Flask environment directory:
mkdir FlaskApp
Move into that directory:
cd FlaskApp
Now make the actual application directory:
mkdir FlaskApp
Now let's go in there:
cd FlaskApp/
Now we're going to make two directories, static and template:
mkdir static
mkdir templates
Now we're ready to create the main file for your first Flask App:
nano __init__.py
Here is where we have our initialization script for our Flask application. You can actually keep all of your main website code right here for simplicity's sake, and that's what we'll be doing. Within your __init__.py file, you will type:
from flask import Flask
app = Flask(__name__)
@app.route('/')
def homepage():
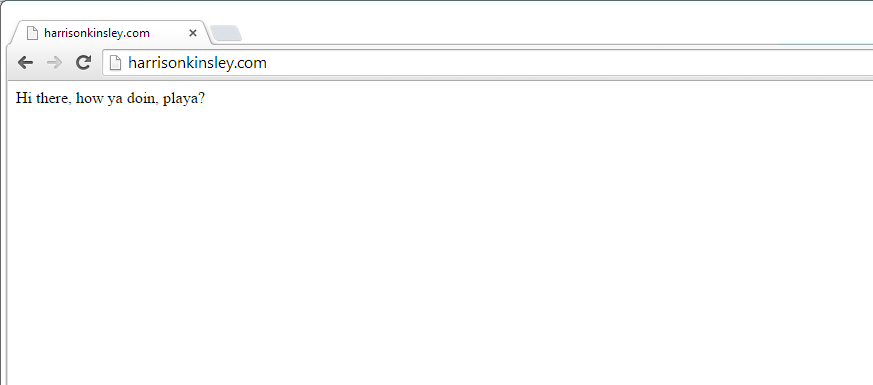
return "Hi there, how ya doin?"
if __name__ == "__main__":
app.run()
Press control+x to save it, yes, enter.
Now we should probably actually get Flask. Let's do that now.
Since this is likely a new server for you, you will want to go ahead and run:
apt-get update
apt-get upgrade
To get Flask, we're going to use pip, so you will need to first get pip if you do not already have it:
apt-get install python-pip
Now that we have pip, we also need virtualenv to create the virtual environment for Flask to run Python and your application in:
pip install virtualenv
Now to set up the virtualenv directory:
sudo virtualenv venv
Activate the virtual environment:
source venv/bin/activate
Now install Flask within your virtual environment
pip install Flask
Find out if everything worked out by going:
python __init__.py
If you didn't get any major errors, congrats!
Hit control+c to get out of the running text, then type deactivate to stop the virtual environment running locally. This is only a local version, so you wont be able to type in anything to your browser to access it.
So now we need to set up our Flask configuration file:
nano /etc/apache2/sites-available/FlaskApp.conf
This is where your Flask configuration goes, which will apply to your live web site. Here's the code that you need to include:
<VirtualHost *:80>
                ServerName yourdomain.com
                ServerAdmin youemail@email.com
                WSGIScriptAlias / /var/www/FlaskApp/flaskapp.wsgi
                <Directory /var/www/FlaskApp/FlaskApp/>
                        Order allow,deny
                        Allow from all
                </Directory>
                Alias /static /var/www/FlaskApp/FlaskApp/static
                <Directory /var/www/FlaskApp/FlaskApp/static/>
                        Order allow,deny
                        Allow from all
                </Directory>
                ErrorLog ${APACHE_LOG_DIR}/error.log
                LogLevel warn
                CustomLog ${APACHE_LOG_DIR}/access.log combined
</VirtualHost>
For your notes, if you want to add more domains/subdomains that point to the same Flask App, or a different app entirely, you can use a ServerAlias, added underneath the ServerAdmin line.
We are now ready to enable the server.
Run:
sudo a2ensite FlaskApp
service apache2 reload
Almost there... now we just need to configure our WSGI file. To do this:
cd /var/www/FlaskApp
nano flaskapp.wsgi
Within the wsgi file, enter:
#!/usr/bin/python
import sys
import logging
logging.basicConfig(stream=sys.stderr)
sys.path.insert(0,"/var/www/FlaskApp/")

from FlaskApp import app as application
application.secret_key = 'your secret key. If you share your website, do NOT share it with this key.'
Save and exit.
Once that is done, run:
service apache2 restart
Get used to running the above command. Flask is very finicky about your python file changes. Every .py file change you make to your webapp, you need to run this command.
Once you have done all of this, you are ready to visit your domain name in your browser. You should see the "Hi there, how ya doin?" string that we output in your __init__.py file.
