Overview of the Face Recognition package
Welcome to a tutorial for implementing the face recognition package for Python.
The purpose of this package is to make facial recognition (identifying a face) fairly simple.
Whether it's for security, smart homes, or something else entirely, the area of application for facial recognition is quite large, so let's learn how we can use this technology.
To begin, we need to install everything.
General Installation Information
face_recognition and face_recognition_models can be installed via pip, but there are quite a few dependencies, which we'll be running through
Installation instruction splits between Windows and Linux for some dependencies, then there is a common part for them.
Windows
- Microsoft Visual Studio 2015 or newer (check if build tools are enough): https://visualstudio.microsoft.com/thank-you-downloading-visual-studio/ - download and install
- Download and install CMake for Windows: https://github.com/Kitware/CMake/releases/download/v3.16.2/cmake-3.16.2-win64-x64.msi (other options available at: https://cmake.org/download/) During installation check to add CMake to PATH for all users (leave everything else default).

- Restart Windows (simply starting new
cmdwindow so it will include changes inPATHshould be enough, restart is a safer option though) pip install --upgrade numpy scipy- Install git client from: https://git-scm.com/download/win
Linux
sudo pip3.7 install --upgrade numpy scipy- Install git client anc cmake:
sudo apt-get update && sudo apt-get -y install git cmake
Common
- Remaining Python dependencies (use correct pip like
sudo pip3,sudo pip3.7on Linux/MacOS):pip install --upgrade Click Pillow - Installing
dlib:- http://dlib.net/release_notes.html, search for
cudato find out supported CUDA versions if GPU acceleration is meant to be used. Currently it supports CUDA 10.1 (for Linux it worked for me with 10.0 too). pip install dliborsudo pip3,sudo pip3.7, etc. WARNING - it's going to be compiled and compilation can require a lot of processing power. Be patient.
- http://dlib.net/release_notes.html, search for
If we aimed for CUDA, let's now check if it compiled to use CUDA:
Of course for Linux/MacOS we call python3, python3.7, etc.
- Installing
face_recognition:pip install git+https://github.com/ageitgey/face_recognition - INtsalling
face_recognition_models:pip install git+https://github.com/ageitgey/face_recognition_models
Bonus: Microsoft Build Tools for Visual Studio 2019
Navigate to: https://visualstudio.microsoft.com/downloads/, scroll down to see Tools for Visual Studio 2019, click it to collapse list, find Build Tools for Visual Studio 19 and click Download next to it:

Run installer and once you'll see components to install choose C++ Build Tools, list on the right-hand side of the window will appear - scroll it down and choose both versions of build tools, now click Install:

Let it install
Bonus: Git for Windows install
Navigate to https://git-scm.com/download/win, download and run installer, leave all options default but 8 and 9 screen, for those 2 we suggest to change options to:


Once you have all of the dependencies and have installed the face_recognition package (pip install face-recognition), we're finally ready to play!
To begin, we'll need some samples of faces that we wish to detect and identify. We can do this task on a single image or with a video.
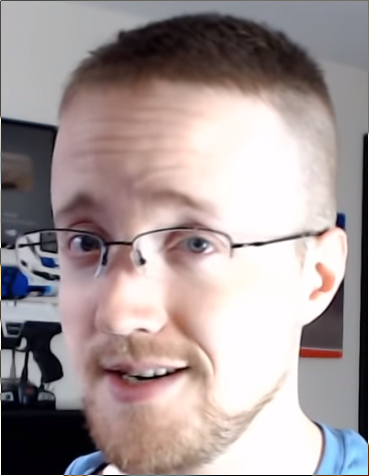
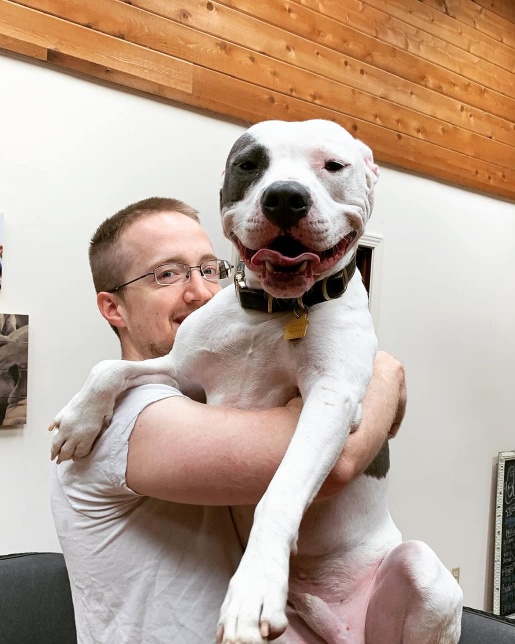
First, we'll create a directory called known_faces, which will house directories of known identities. Inside of known_faces, I will add a directory called Sentdex. Inside of here, I will have the following images:


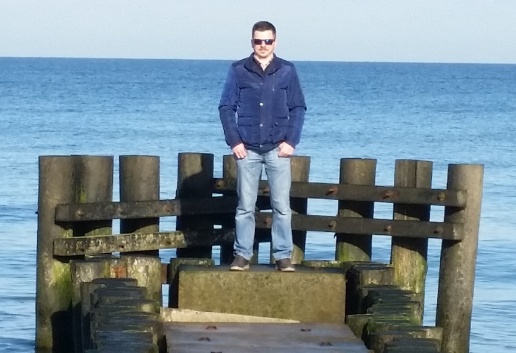
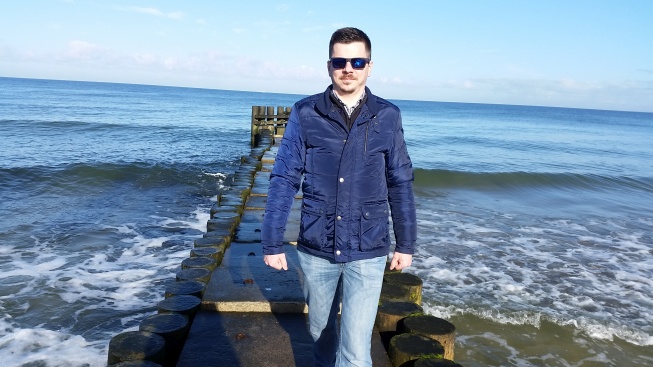
We can then add a new directory called unknown_faces. These are faces that we intend to label (if any of the known faces exist in these images). Here are the ones I will use:


Now we can begin our code. Just for clarity, the structure of our project should be something like:
face_rec_example.py
known_faces
-imgs
unknown_faces
-imgs
Obviously, do not name your file that we're working on here face_recognition or you'll have import issues! We'll start with imports and constants:
import face_recognition
import os
import cv2


KNOWN_FACES_DIR = 'known_faces'
UNKNOWN_FACES_DIR = 'unknown_faces'
TOLERANCE = 0.6
FRAME_THICKNESS = 3
FONT_THICKNESS = 2
MODEL = 'cnn'  # 'hog' or 'cnn' - CUDA accelerated (if available) deep-learning pretrained model
We'll be using os for working with directories and cv2 for labeling/drawing on our images.
The first two constants are just the names of our known and unknown directories.
Next we have TOLERANCE. This is a value from 0 to 1 that will allow you to tweak the sensitivity of labeling/predictions. The default value here in the face_recognition package is 0.6. The lower the tolerance, the more "strict" the labels will be.
If you're getting a bunch of labels of some identity on a bunch of faces that aren't correct, you may want to lower the TOLERANCE. If you're not getting any labels at all, then you might want to raise the TOLERANCE.
The FRAME_THICKNESS value is how many pixels wide do you want the rectangles that encase a face to be and FONT_THICKNESS is how thick you want the font with the label to be.
Finally, you can choose what model to use. We'll use the cnn (convolutional neural network), but you can also use hog (histogram of oriented gradients) which is a non-deep learning approach to object detection.
The first things we need to do is prepare the faces that we intend to look for/identify. We'll start with a couple of lists. One for the faces, the other for the names associated with these faces:
print('Loading known faces...')
known_faces = []
known_names = []
Now we iterate over our known faces directory, which contains possibly many directories of identities, which then contain one or more images with that person's face. From here, we want to load in this image with the face_recognition package, like:
for name in os.listdir(KNOWN_FACES_DIR):

    # Next we load every file of faces of known person
    for filename in os.listdir(f'{KNOWN_FACES_DIR}/{name}'):

        # Load an image
        image = face_recognition.load_image_file(f'{KNOWN_FACES_DIR}/{name}/{filename}')
Continuing along in this same loop, we will encode each of these faces, then store the encodings and the associated identity to our lists:
for name in os.listdir(KNOWN_FACES_DIR):

    # Next we load every file of faces of known person
    for filename in os.listdir(f'{KNOWN_FACES_DIR}/{name}'):

        # Load an image
        image = face_recognition.load_image_file(f'{KNOWN_FACES_DIR}/{name}/{filename}')

        # Get 128-dimension face encoding
        # Always returns a list of found faces, for this purpose we take first face only (assuming one face per image as you can't be twice on one image)
        encoding = face_recognition.face_encodings(image)[0]

        # Append encodings and name
        known_faces.append(encoding)
        known_names.append(name)
At this point, we're ready to check unknown images for faces, and then to try to identify those faces!
This loop will start in a familiar way:
print('Processing unknown faces...')
# Now let's loop over a folder of faces we want to label
for filename in os.listdir(UNKNOWN_FACES_DIR):

    # Load image
    print(f'Filename {filename}', end='')
    image = face_recognition.load_image_file(f'{UNKNOWN_FACES_DIR}/{filename}')
While known_images are just face shots, we assume that unknown images might have multiple people and other objects in them. Thus, we want to first locate those faces. We do that with:
locations = face_recognition.face_locations(image, model=MODEL)
Then we'd encode these images:
encodings = face_recognition.face_encodings(image, locations)
Notice that this method of encoding for the unknown faces is different than the encoding we used for the known face, which was: encoding = face_recognition.face_encodings(image)[0]
It's expected that our known face isn the only face in the image, so we're going with the first encoding, and we didnt first grab locations because we don't really care about locations of faces in the known_images, but we want these locations in the unknown images so that we can label them.
Now we can iterate over the faces found in the unknown images, to see if we can find a match with any of our known faces. If we find one, we want to draw a rectangle around them. For that reason, we're going to use OpenCV to draw, and we'll first convert the image from RGB to BGR since OpenCV uses BGR. Doing that is as simple as:
image = cv2.cvtColor(image, cv2.COLOR_RGB2BGR)
This makes our current loop so far:
print('Processing unknown faces...')
# Now let's loop over a folder of faces we want to label
for filename in os.listdir(UNKNOWN_FACES_DIR):

    # Load image
    print(f'Filename {filename}', end='')
    image = face_recognition.load_image_file(f'{UNKNOWN_FACES_DIR}/{filename}')

    # This time we first grab face locations - we'll need them to draw boxes
    locations = face_recognition.face_locations(image, model=MODEL)

    # Now since we know loctions, we can pass them to face_encodings as second argument
    # Without that it will search for faces once again slowing down whole process
    encodings = face_recognition.face_encodings(image, locations)

    # We passed our image through face_locations and face_encodings, so we can modify it
    # First we need to convert it from RGB to BGR as we are going to work with cv2
    image = cv2.cvtColor(image, cv2.COLOR_RGB2BGR)
Now we're going to iterate over each face found in the unknown image and check for any matches with our known faces:
print('Processing unknown faces...')
# Now let's loop over a folder of faces we want to label
for filename in os.listdir(UNKNOWN_FACES_DIR):

    # Load image
    print(f'Filename {filename}', end='')
    image = face_recognition.load_image_file(f'{UNKNOWN_FACES_DIR}/{filename}')

    # This time we first grab face locations - we'll need them to draw boxes
    locations = face_recognition.face_locations(image, model=MODEL)

    # Now since we know loctions, we can pass them to face_encodings as second argument
    # Without that it will search for faces once again slowing down whole process
    encodings = face_recognition.face_encodings(image, locations)

    # We passed our image through face_locations and face_encodings, so we can modify it
    # First we need to convert it from RGB to BGR as we are going to work with cv2
    image = cv2.cvtColor(image, cv2.COLOR_RGB2BGR)

    # But this time we assume that there might be more faces in an image - we can find faces of dirrerent people
    print(f', found {len(encodings)} face(s)')
    for face_encoding, face_location in zip(encodings, locations):

        # We use compare_faces (but might use face_distance as well)
        # Returns array of True/False values in order of passed known_faces
        results = face_recognition.compare_faces(known_faces, face_encoding, TOLERANCE)
The results variable holds a list of booleans, regarding if any matches were found:
print(results)
We take the index value for any of the True's here, and look for the name from our known_names variable:
match = known_names[results.index(True)]
print(match)
Now we want to draw a rectangle around this recognized face. To draw a rectangle in OpenCV, we need the top left and bottom right coordinates, and we use cv2.rectangle to draw it.
We also need a color for this box, and it would be neat to have this box color fairly unique to the identity.
Daniel (DhanOS) came up with the following code to take the first 3 letters in the string, and convert these to RGB values:
color = [(ord(c.lower())-97)*8 for c in match[:3]]
print(color)
Which we'll convert to a function:
# Returns (R, G, B) from name
def name_to_color(name):
    # Take 3 first letters, tolower()
    # lowercased character ord() value rage is 97 to 122, substract 97, multiply by 8
    color = [(ord(c.lower())-97)*8 for c in name[:3]]
    return color
Beyond having a rectangle for the face itself, we'll add a smaller rectangle for the text for the identity, then of course place the text for that identity. The part just for that:
        if True in results:  # If at least one is true, get a name of first of found labels
            match = known_names[results.index(True)]
            print(f' - {match} from {results}')

            # Each location contains positions in order: top, right, bottom, left
            top_left = (face_location[3], face_location[0])
            bottom_right = (face_location[1], face_location[2])

            # Get color by name using our fancy function
            color = name_to_color(match)

            # Paint frame
            cv2.rectangle(image, top_left, bottom_right, color, FRAME_THICKNESS)

            # Now we need smaller, filled grame below for a name
            # This time we use bottom in both corners - to start from bottom and move 50 pixels down
            top_left = (face_location[3], face_location[2])
            bottom_right = (face_location[1], face_location[2] + 22)

            # Paint frame
            cv2.rectangle(image, top_left, bottom_right, color, cv2.FILLED)

            # Wite a name
            cv2.putText(image, match, (face_location[3] + 10, face_location[2] + 15), cv2.FONT_HERSHEY_SIMPLEX, 0.5, (200, 200, 200), FONT_THICKNESS)
Making our full code:
import face_recognition
import os
import cv2


KNOWN_FACES_DIR = 'known_faces'
UNKNOWN_FACES_DIR = 'unknown_faces'
TOLERANCE = 0.6
FRAME_THICKNESS = 3
FONT_THICKNESS = 2
MODEL = 'cnn'  # default: 'hog', other one can be 'cnn' - CUDA accelerated (if available) deep-learning pretrained model


# Returns (R, G, B) from name
def name_to_color(name):
    # Take 3 first letters, tolower()
    # lowercased character ord() value rage is 97 to 122, substract 97, multiply by 8
    color = [(ord(c.lower())-97)*8 for c in name[:3]]
    return color


print('Loading known faces...')
known_faces = []
known_names = []

# We oranize known faces as subfolders of KNOWN_FACES_DIR
# Each subfolder's name becomes our label (name)
for name in os.listdir(KNOWN_FACES_DIR):

    # Next we load every file of faces of known person
    for filename in os.listdir(f'{KNOWN_FACES_DIR}/{name}'):

        # Load an image
        image = face_recognition.load_image_file(f'{KNOWN_FACES_DIR}/{name}/{filename}')

        # Get 128-dimension face encoding
        # Always returns a list of found faces, for this purpose we take first face only (assuming one face per image as you can't be twice on one image)
        encoding = face_recognition.face_encodings(image)[0]

        # Append encodings and name
        known_faces.append(encoding)
        known_names.append(name)


print('Processing unknown faces...')
# Now let's loop over a folder of faces we want to label
for filename in os.listdir(UNKNOWN_FACES_DIR):

    # Load image
    print(f'Filename {filename}', end='')
    image = face_recognition.load_image_file(f'{UNKNOWN_FACES_DIR}/{filename}')

    # This time we first grab face locations - we'll need them to draw boxes
    locations = face_recognition.face_locations(image, model=MODEL)

    # Now since we know loctions, we can pass them to face_encodings as second argument
    # Without that it will search for faces once again slowing down whole process
    encodings = face_recognition.face_encodings(image, locations)

    # We passed our image through face_locations and face_encodings, so we can modify it
    # First we need to convert it from RGB to BGR as we are going to work with cv2
    image = cv2.cvtColor(image, cv2.COLOR_RGB2BGR)

    # But this time we assume that there might be more faces in an image - we can find faces of dirrerent people
    print(f', found {len(encodings)} face(s)')
    for face_encoding, face_location in zip(encodings, locations):

        # We use compare_faces (but might use face_distance as well)
        # Returns array of True/False values in order of passed known_faces
        results = face_recognition.compare_faces(known_faces, face_encoding, TOLERANCE)

        # Since order is being preserved, we check if any face was found then grab index
        # then label (name) of first matching known face withing a tolerance
        match = None
        if True in results:  # If at least one is true, get a name of first of found labels
            match = known_names[results.index(True)]
            print(f' - {match} from {results}')

            # Each location contains positions in order: top, right, bottom, left
            top_left = (face_location[3], face_location[0])
            bottom_right = (face_location[1], face_location[2])

            # Get color by name using our fancy function
            color = name_to_color(match)

            # Paint frame
            cv2.rectangle(image, top_left, bottom_right, color, FRAME_THICKNESS)

            # Now we need smaller, filled grame below for a name
            # This time we use bottom in both corners - to start from bottom and move 50 pixels down
            top_left = (face_location[3], face_location[2])
            bottom_right = (face_location[1], face_location[2] + 22)

            # Paint frame
            cv2.rectangle(image, top_left, bottom_right, color, cv2.FILLED)

            # Wite a name
            cv2.putText(image, match, (face_location[3] + 10, face_location[2] + 15), cv2.FONT_HERSHEY_SIMPLEX, 0.5, (200, 200, 200), FONT_THICKNESS)

    # Show image
    cv2.imshow(filename, image)
    cv2.waitKey(0)
    cv2.destroyWindow(filename)
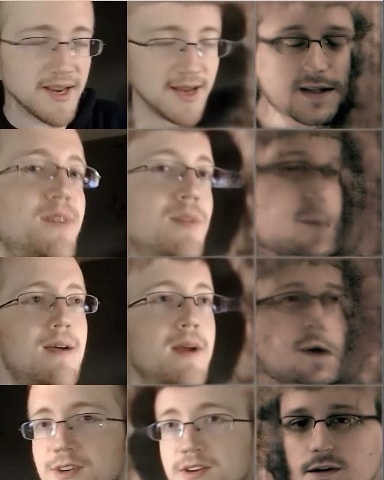
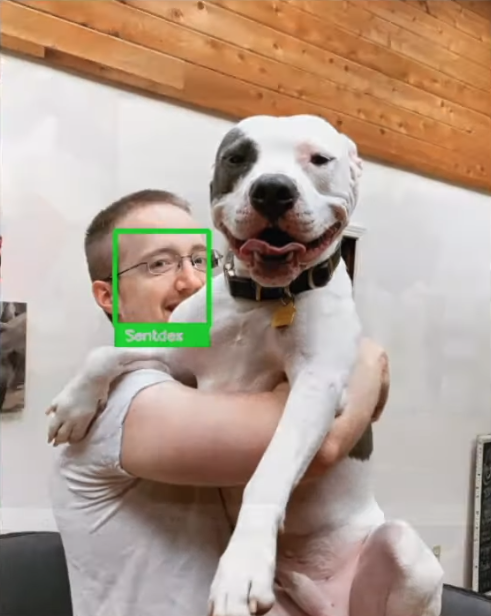
Example of results:
-
Overview of the Face Recognition package
