Intro to MySQL
This tutorial covers MySQL, which is one of the most popular choices for databases. MySQL is a version of SQL, which is actually a programming language of its own. Don't worry though, it's not too difficult, it should seem no different than learning any other Python module. MySQL syntax remains the same across programming languages, so you should have no trouble finding documentation for just about anything you want to do with it.
The only stipulation I will add is that, while the MySQL syntax remains the same across languages, things like the insertion of variables do not. Static (no variables) strings for MySQL are identical, but how you will insert variable data will change from programming language to programming language.
This tutorial series is going to make use of PythonAnywhere.com. If you are not familiar with them, they are a host that deals almost entirely with Python. Whether you want to host a simple Python website, or you want to run Python consoles in the cloud, this website is a worthy choice.
The reason why we are going to be using it is to avoid the massive headaches that can come with installing a local MySQL server. This is mainly a problem with Windows machines, but can be a challenge on any personal computer.
If you have a local version of MySQL, or you have your own web server with MySQL, you can still follow along with this tutorial, I will do my best to bring up any differences between the two methods. We're mainly using PythonAnywhere for everyone else who doesn't have a MySQL instance somewhere.
PythonAnywhere:
Sign up for a free account with PythonAnywhere.com, then head to the dashboard. At this point, you now have your "server" and you already have MySQL.
Click on Databases, then set your password.
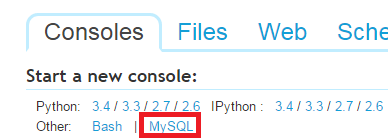
To access the MySQL console, you just need to click on "MySQL" in the "other" category near the top.
You can also access your database by clicking on bash, then:
mysql --user=root -p
"root" will be replaced with your username, or root if you're using root, and you will need to enter your MySQL DB password that you put in when you set up the server.
Via your own Server:
If you have not already, you need to install MySQL. Here's my usual cookbook recipe for Ubuntu servers:
sudo apt-get install apache2 mysql-client mysql-server
Now, whenever we click on "MySQL" to access the shell in PythonAnywhere, your command should be something like:
mysql --user=root -p
"root" will be replaced with your username, or root if you're using root, and you will need to enter your MySQL DB password that you put in when you set up the server.
Within the MySQL console, type the following, replacing dbname with your database name.
mysql> CREATE DATABASE dbname;
Now that you have a database, and assuming you are in the root directory (as in your have not selected any database or table) of MySQL, let's show some basic queries.
SHOW DATABASES;
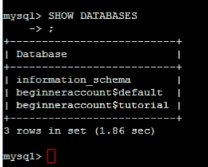
Coming from Python, it's probably going to be hard at first to remember your semi colons at the end, but you'll need those. This command will list out all of your current Databases. You should have just created a database, and you should see that database name in the list. You should also see "information_schema."
Notice the "all caps" for MySQL commands? This is just done in the name of best practice. The commands do not need to be in all caps, but it helps people to differentiate what is a MySQL command or term, and what is the actual variable data.
SHOW PROCESSLIST;

Showing the processlist can be one of the first steps to debugging a high memory/cpu intensive problem with your database. Here, you can see what processes are currently running in MySQL, their ID, their state, their commmand, and some info.
